Install Guide
Create Sub Account in NAVER Cloud
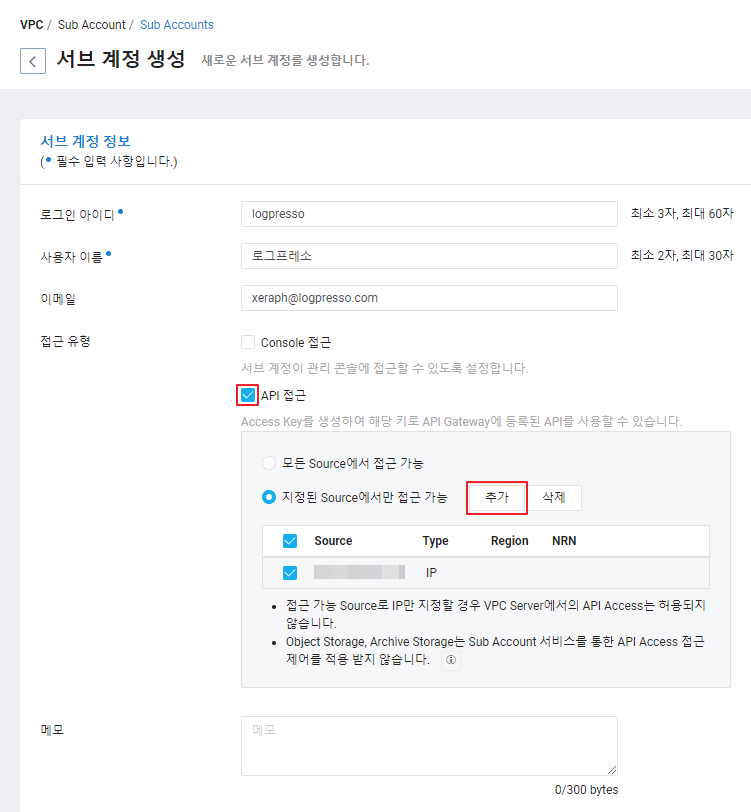
It is recommended to create a dedicated sub account with minimal permissions specifically for Logpresso access, even though you can issue an access key from an existing account. Configure the sub account as shown below, allowing only API Access and restricting access to the public IP address of the Logpresso instance.
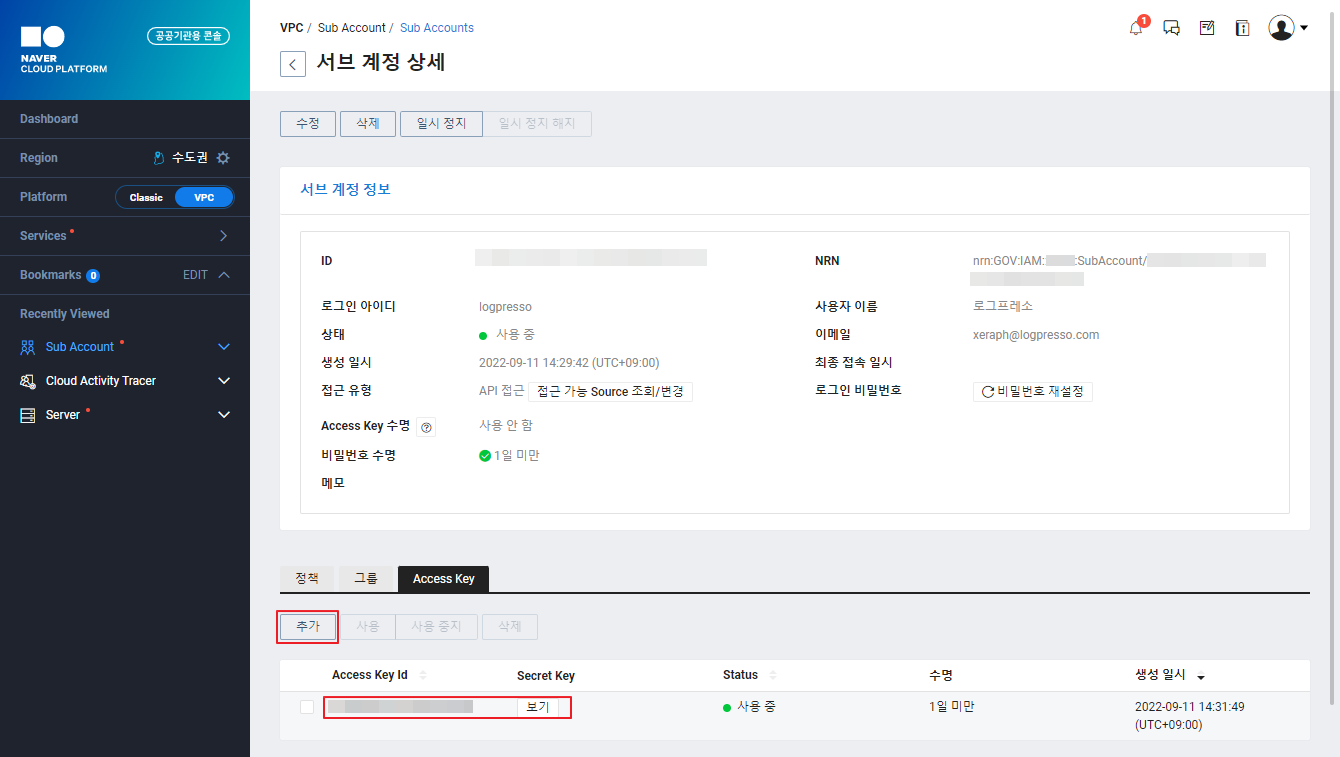
Navigate to the Sub Accounts menu, click on the Logpresso account, and move to the Access Key tab. Click the Add button to generate a new access key. Once generated, copy the Access Key Id and Secret Key for use in later steps.
Issue NAVER CLOUD PLATFORM Access Key For Existing Account
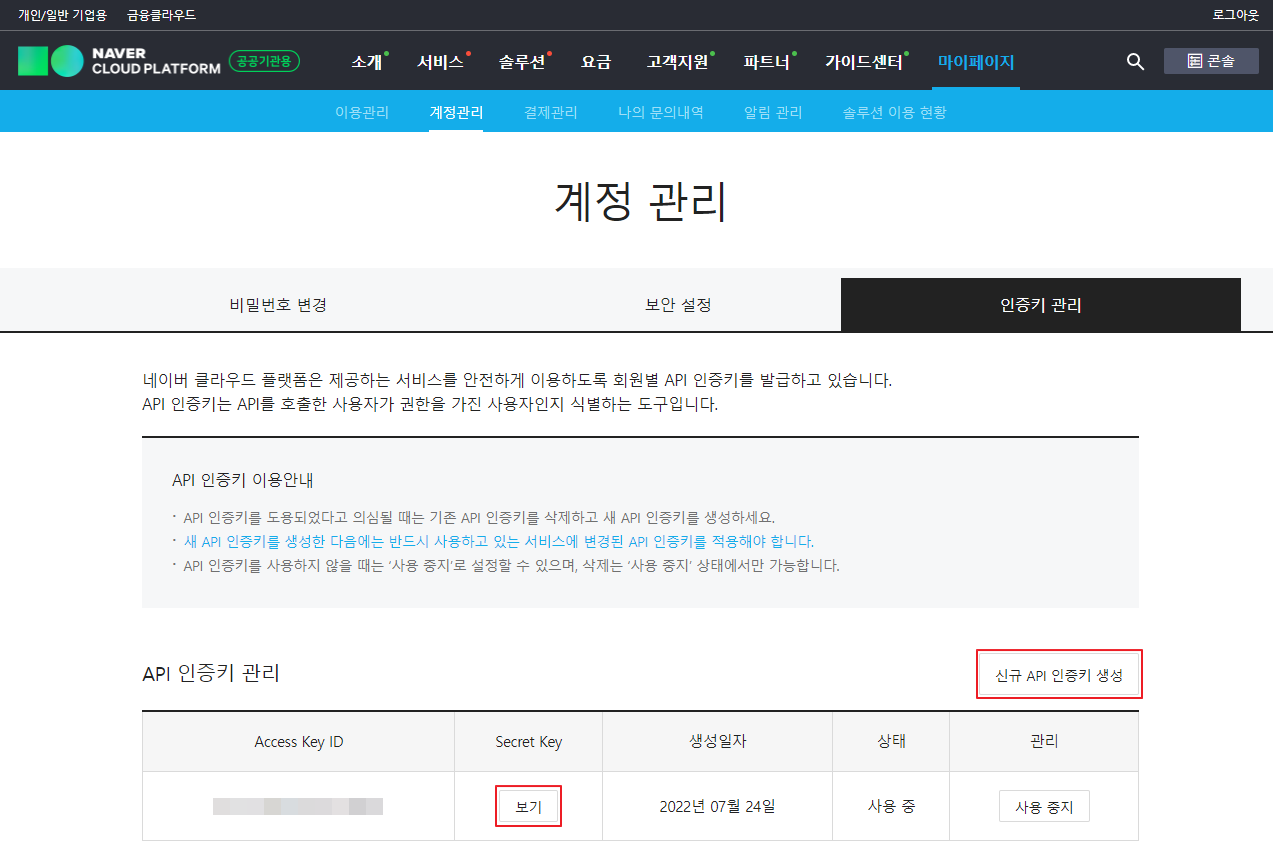
Log in to NAVER CLOUD PLATFORM and select the Manage authentication key menu on the My page. If you don't see the menu, make sure the sub account is authorized to use the API.
Click the Generate new API access key button in the Access key management menu to generate an access key as shown below. Copy the Access Key ID and Secret Key so that you can use them in later steps.
Sub Account Permissions
To use all queries and dashboards provided by NAVER CLOUD PLATFORM app, add following permissions to the sub account:
Policy Name
- NCP_FINANCE_MANAGER
- NCP_CLOUD_ACTIVITY_TRACER_VIEWER
- NCP_SUB_ACCOUNT_VIEWER
- NCP_VPC_SERVER_VIEWER
- NCP_VPC_VIEWER
Set Up Connect Profile
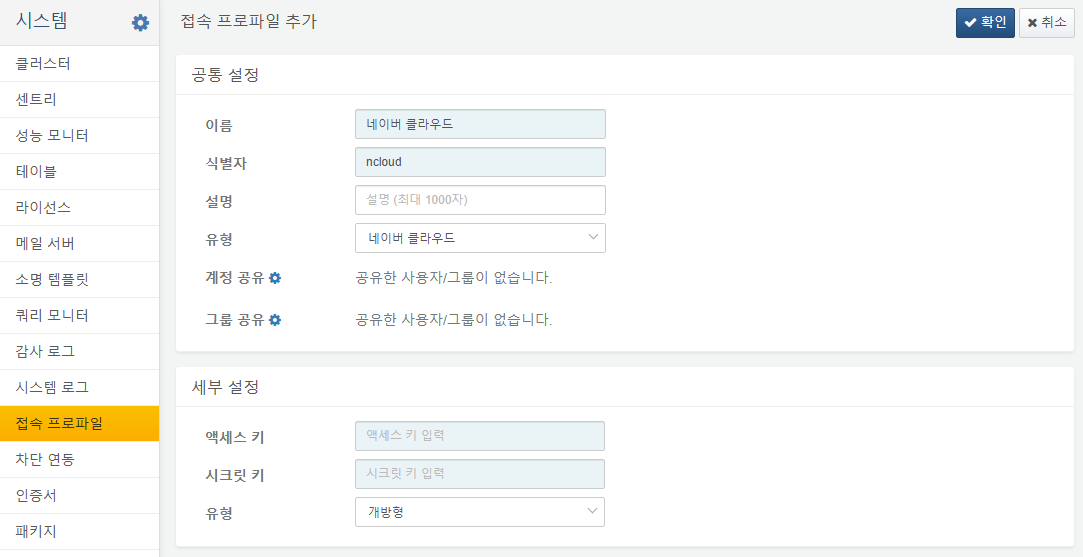
Install and run the NAVER CLOUD PLATFORM app and add a connect profile as shown below to complete the setup. There are two types of clouds: open clouds and public clouds. Public clouds use a different API gateway address.
Go to the NAVER CLOUD PLATFORM dashboard and check if the data retrieval is successful.


