Install Guide
Create Telegram Bot
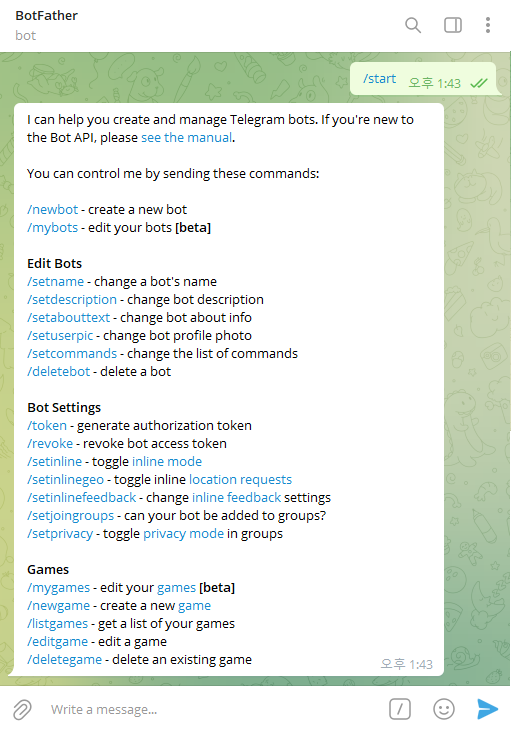
Start by interacting with BotFather on Telegram. You can access it directly via https://t.me/botfather or by adding @botfather to your contacts. Click the START button at the bottom to view the bot management commands.
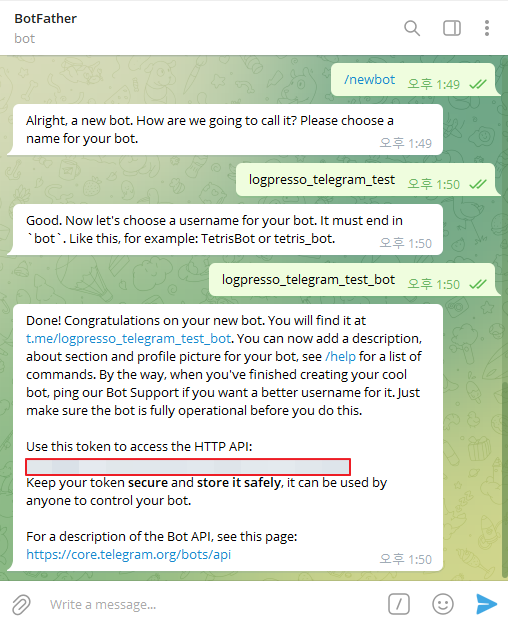
Type /newbot in the chat. You will be prompted to provide:
- Bot Name: This will be the visible name of your bot.
- Account Name (Username): Must end with _bot and only contain alphabetic characters and underscores.
Copy the entire token string that appears at the bottom. This token is essential for controlling the bot via HTTP API. Keep this token secure and do not expose it publicly.
Verify Telegram Chat ID
Verifying the recipient is a slightly complicated process. There are publicly available Telegram bot services that provide the /get_my_id command, which you can use as a reference, but if you want to avoid exposing unnecessary information, use the standard procedure below.
Open your browser and call the API:
Initially, this will return an empty response as no messages have been sent to the bot yet.
Add your newly created bot to a chat or start a conversation with it. You can also open the bot's username in your browser (e.g., https://t.me/<your_bot_username>) and click the START button.
Refresh the getUpdates API call. You should now see a JSON response with the chat details. The id field under the from section represents the chat_id of the user or group.
Set Up Connect Profile
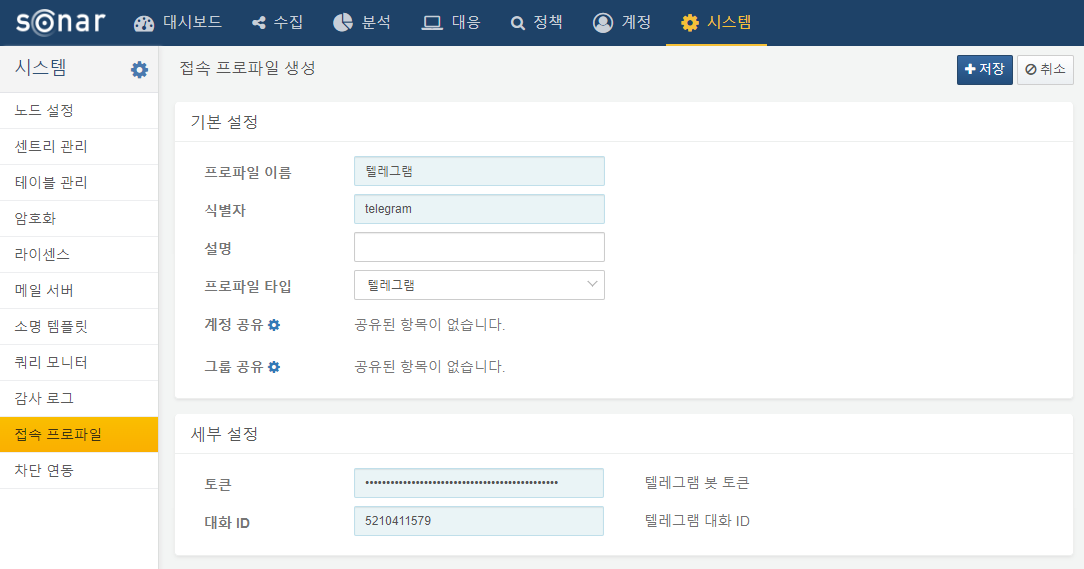
Configure the connect profile by providing the API token and chat_id. Go to Settings > Connect Profiles and configure the profile as shown below:
Send Test Message
Once the connect profile is set up, you can test the integration by using the telegram-send query.


