

Install Guide
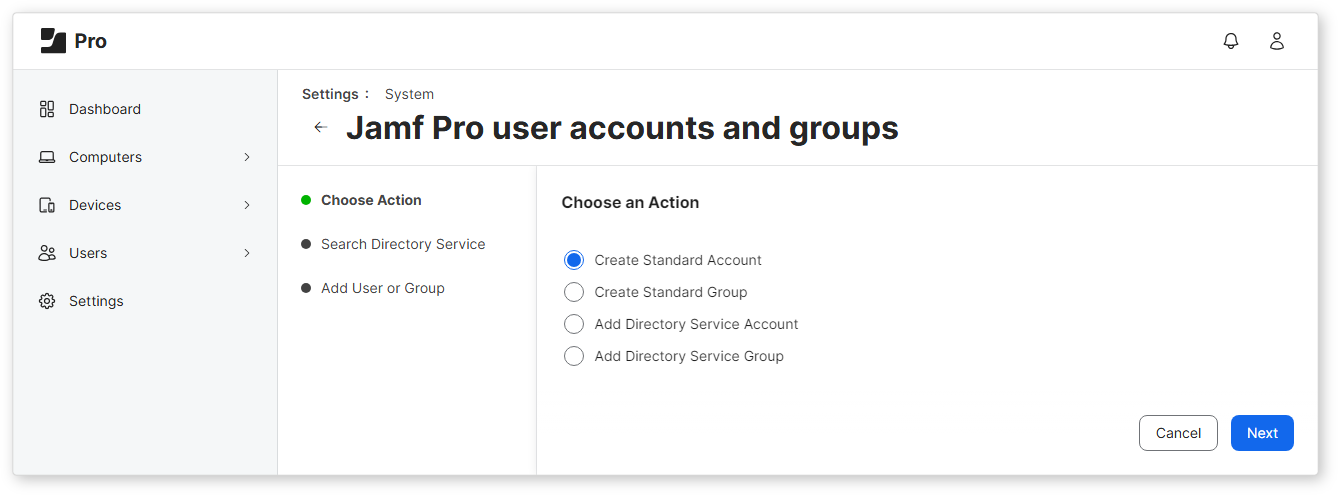
Create Jamf Pro Account
-
Click the New button under Settings > User accounts and groups.
-
From the list, select Create Standard Account and then click the Next button.
-
In the New Account screen, enter the account details for
logpressoas shown below and click the Save button.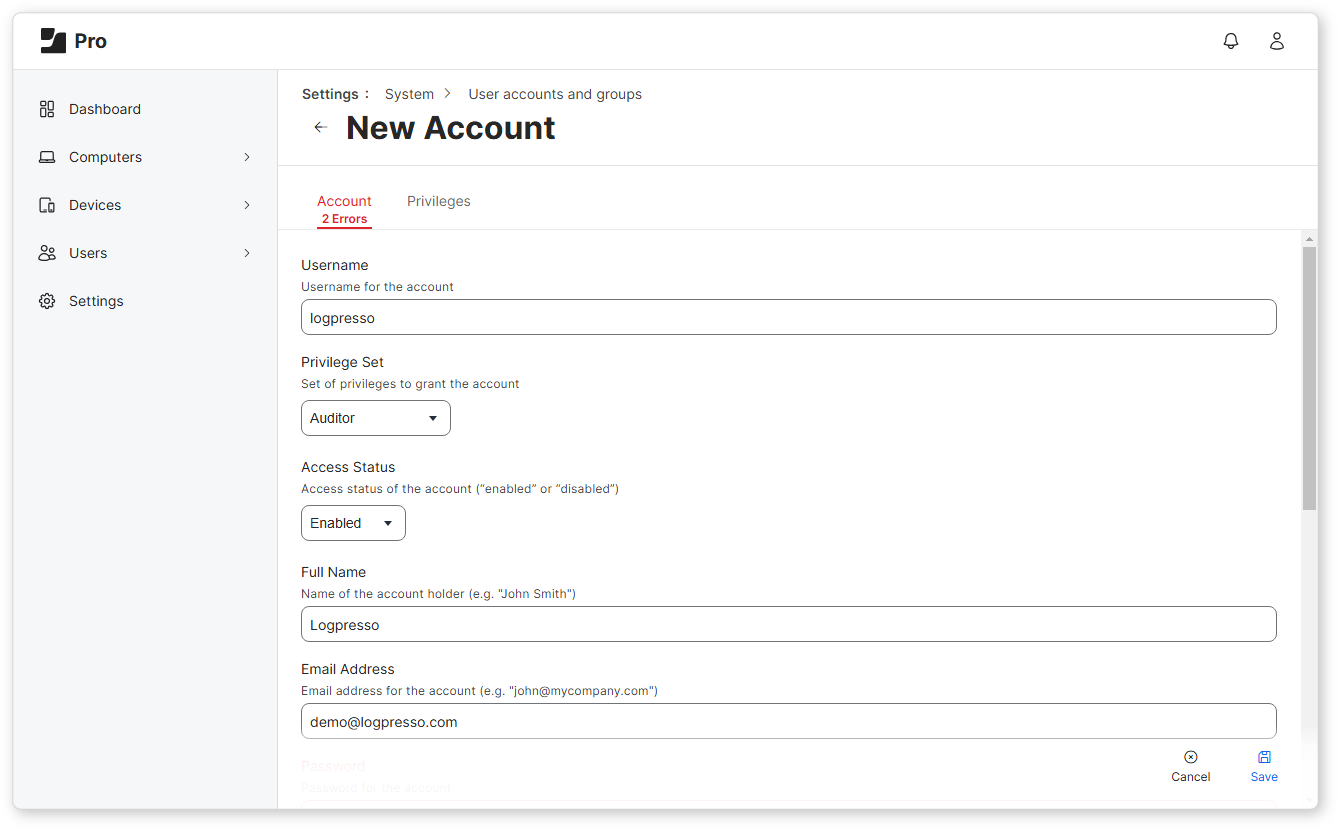
- Username:
logpresso - Privilege Set:
Auditor - Access Status:
Enabled - Full name: Enter the name of the Logpresso administrator.
- Email Address: Enter the email address of the Logpresso administrator.
- Username:
### Set Up Connect Profile
Refer to this article to add a connection profile.
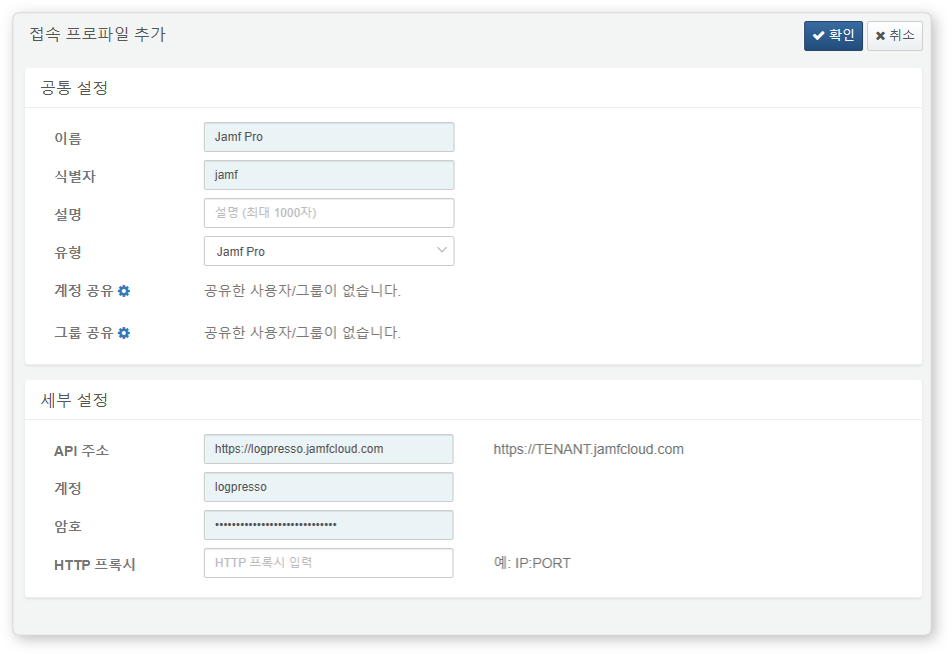
The following fields are required during connection profile setup.
- Name: A unique name to identify the profile
- Identifier: A unique identifier for the profile to use in logpresso queries, etc.
- Type:
Jamf Pro - Endpoint: Address in the format
https://TENANT.jamfcloud.com - Account: Account set up in Jamf Pro (
logpresso) - Password: Password for the account set up in Jamf Pro
Logger Setup
Follow the guide in this document to add a logger. The default dashboards and datasets reference a table starting with the name MDM_JAMF_PRO.
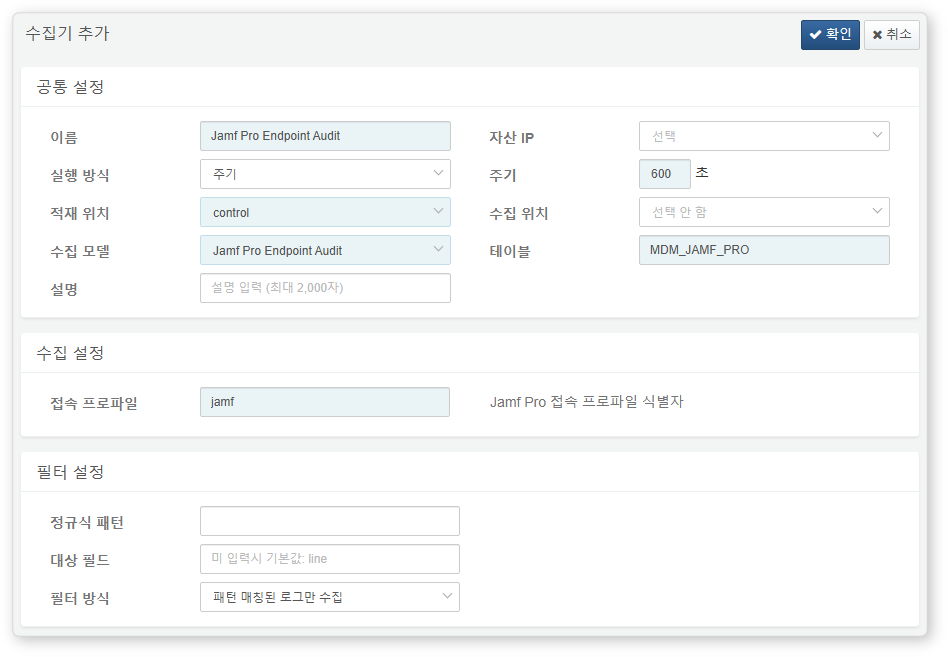
Here are the required fields for the setup:
- Name: A unique name to identify the logger
- Interval: 600 seconds (The Jamf Pro API does not support period filters, so the entire audit log will be retrieved from the beginning each collection cycle. Check the collection duration once and adjust accordingly.)
- Storage Location/Data Source: Choose an appropriate node based on your Logpresso platform configuration.
- Logger Model:
Jamf Pro Endpoint Audit - Table: Enter the name of the table starting with
MDM_JAMF_PRO. - Connect Profile: Specify the connect profile identifier set in the previous step.