

Install Guide
AWS Integration Guide
To use AWS APIs with Logpresso, you must configure appropriate IAM policies and IAM users.
Step 1: Create IAM Policy
In the IAM service console, create a new policy using the provided JSON. This policy grants read-only access to various AWS services. You may customize the policy to limit access only to specific resources.
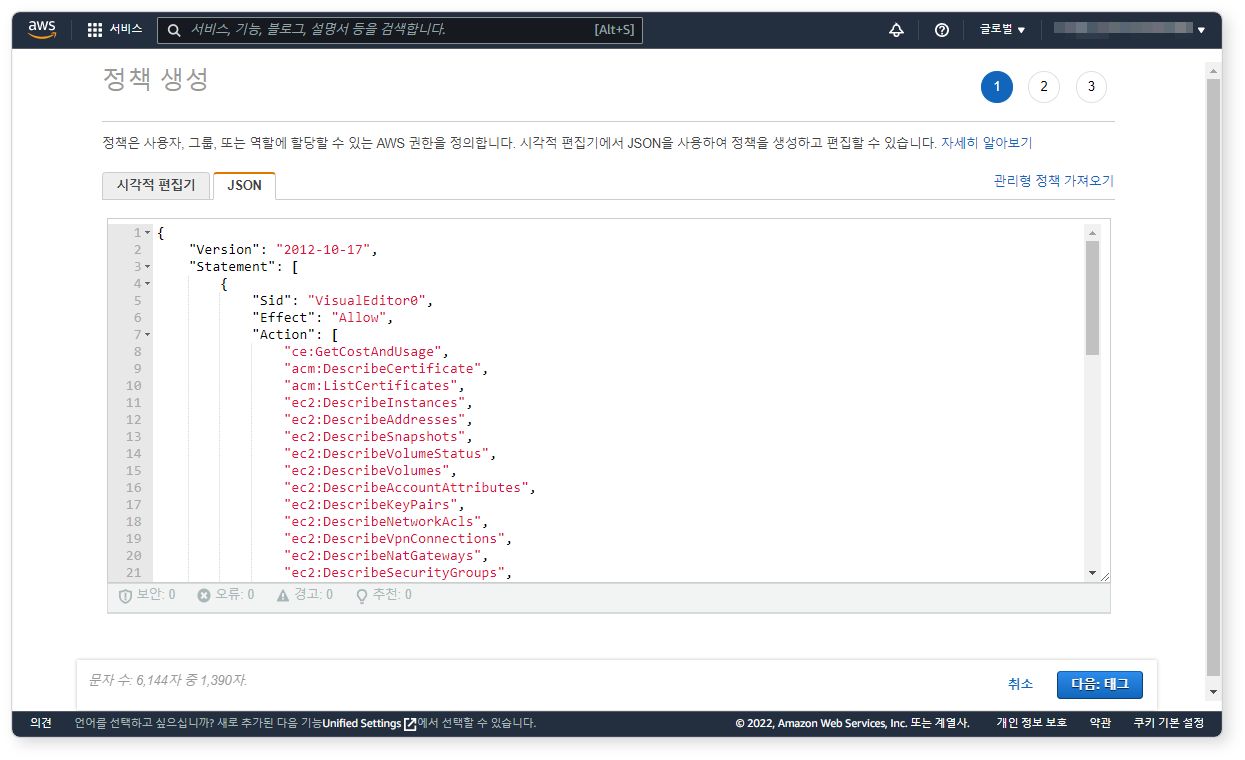
{
    "Version": "2012-10-17",
    "Statement": [
        {
            "Sid": "VisualEditor0",
            "Effect": "Allow",
            "Action": [
                "ce:GetCostAndUsage",
                "acm:DescribeCertificate",
                "acm:ListCertificates",
                "ec2:DescribeVpcs",
                "ec2:DescribeInstances",
                "ec2:DescribeAddresses",
                "ec2:DescribeSnapshots",
                "ec2:DescribeVolumeStatus",
                "ec2:DescribeVolumes",
                "ec2:DescribeAccountAttributes",
                "ec2:DescribeKeyPairs",
                "ec2:DescribeNetworkAcls",
                "ec2:DescribeVpnConnections",
                "ec2:DescribeNatGateways",
                "ec2:DescribeSecurityGroups",
                "ec2:DescribeSubnets",
                "ec2:DescribeRouteTables",
                "ec2:DescribeInstanceStatus",
                "ec2:DescribeImages",
                "autoscaling:DescribeAutoScalingGroups",
                "cloudwatch:GetMetricData",
                "cloudwatch:ListMetrics",
                "logs:DescribeLogGroups",
                "iam:ListPolicies",
                "iam:ListRoles",
                "iam:ListUsers",
                "iam:ListMFADevices",
                "iam:ListAccessKeys",
                "iam:GenerateCredentialReport",
                "iam:GetCredentialReport",
                "iam:ListVirtualMFADevices",
                "iam:ListServerCertificates",
                "elasticbeanstalk:DescribeEnvironments",
                "elasticbeanstalk:DescribeInstancesHealth",
                "elasticbeanstalk:DescribeApplications",
                "elasticloadbalancing:DescribeLoadBalancers",
                "elasticloadbalancing:DescribeTargetHealth",
                "elasticloadbalancing:DescribeLoadBalancerAttributes",
                "elasticloadbalancing:DescribeTargetGroups",
                "rds:DescribeEvents",
                "rds:DescribeDBLogFiles",
                "rds:DownloadDBLogFilePortion",
                "s3:ListAllMyBuckets",
                "s3:ListBucket",
                "s3:GetObject",
                "s3:GetBucketAcl",
                "s3:GetBucketLocation",
                "route53:ListHostedZones",
                "wafv2:GetIPSet",
                "wafv2:ListIPSets",
                "wafv2:UpdateIPSet"
            ],
            "Resource": "*"
        }
    ]
}
To use WAF query commands or enable block integration, you must add the required permissions:
{
    "Version": "2012-10-17",
    "Statement": [
        {
            "Sid": "VisualEditor0",
            "Effect": "Allow",
            "Action": [
                "wafv2:GetIPSet",
                "wafv2:ListIPSets",
                "wafv2:UpdateIPSet"
            ],
            "Resource": "*"
        }
    ]
}
To use ECR query commands, additional permissions must also be added:
{
	"Version": "2012-10-17",
	"Statement": [
		{
			"Sid": "VisualEditor0",
			"Effect": "Allow",
			"Action": [
				"ecr:DescribeImageScanFindings",
				"ecr:DescribeRegistry",
				"ecr:GetAuthorizationToken",
				"ecr:ListImages",
				"ecr:GetRegistryScanningConfiguration",
				"ecr:BatchGetImage",
				"ecr:DescribeImages",
				"ecr:DescribeRepositories",
				"ecr:GetRepositoryPolicy",
				"inspector2:ListCoverageStatistics",
				"inspector2:ListFindings",
				"inspector2:ListFindingAggregations",
				"inspector2:ListCoverage",
				"inspector2:GetFindingsReportStatus",
				"inspector:ListFindings",
				"inspector:DescribeFindings"
			],
			"Resource": "*"
		}
	]
}
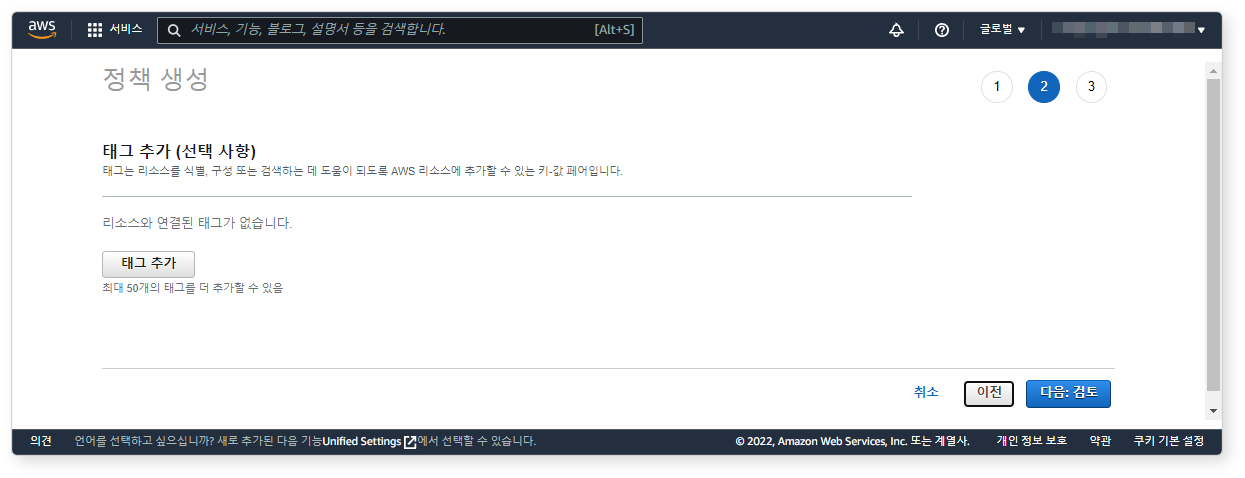
Step 2: Add Policy Tags (Optional)
Tags are optional. You may skip this step.
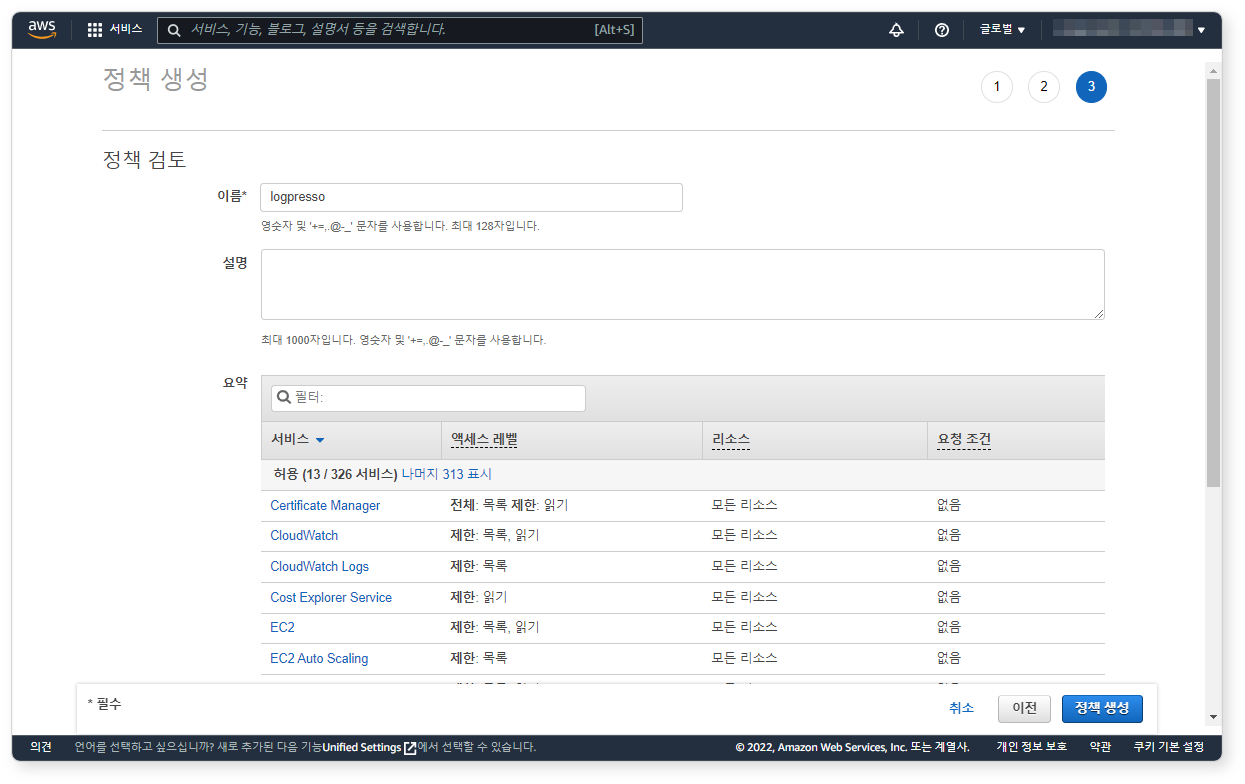
Step 3: Review Policy
Confirm that the policy is configured as read-only and click Create Policy.
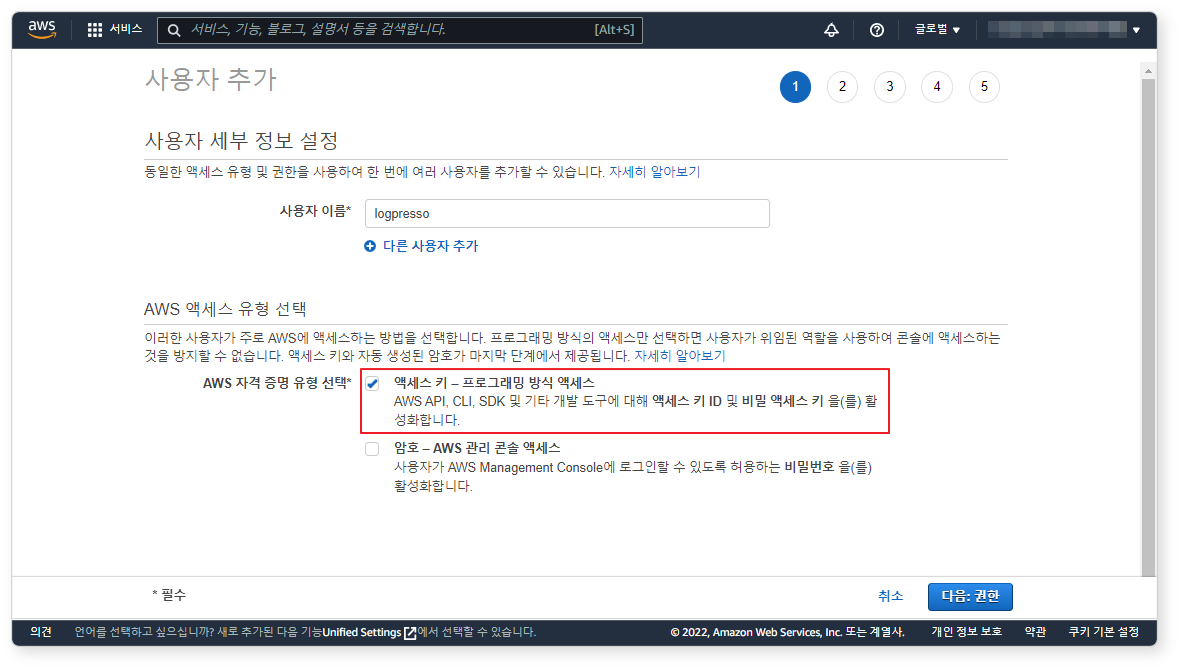
Add IAM User
Step 1: Set Username and Access Type
Since login is not required, select Access key – Programmatic access, then click Next: Permissions.
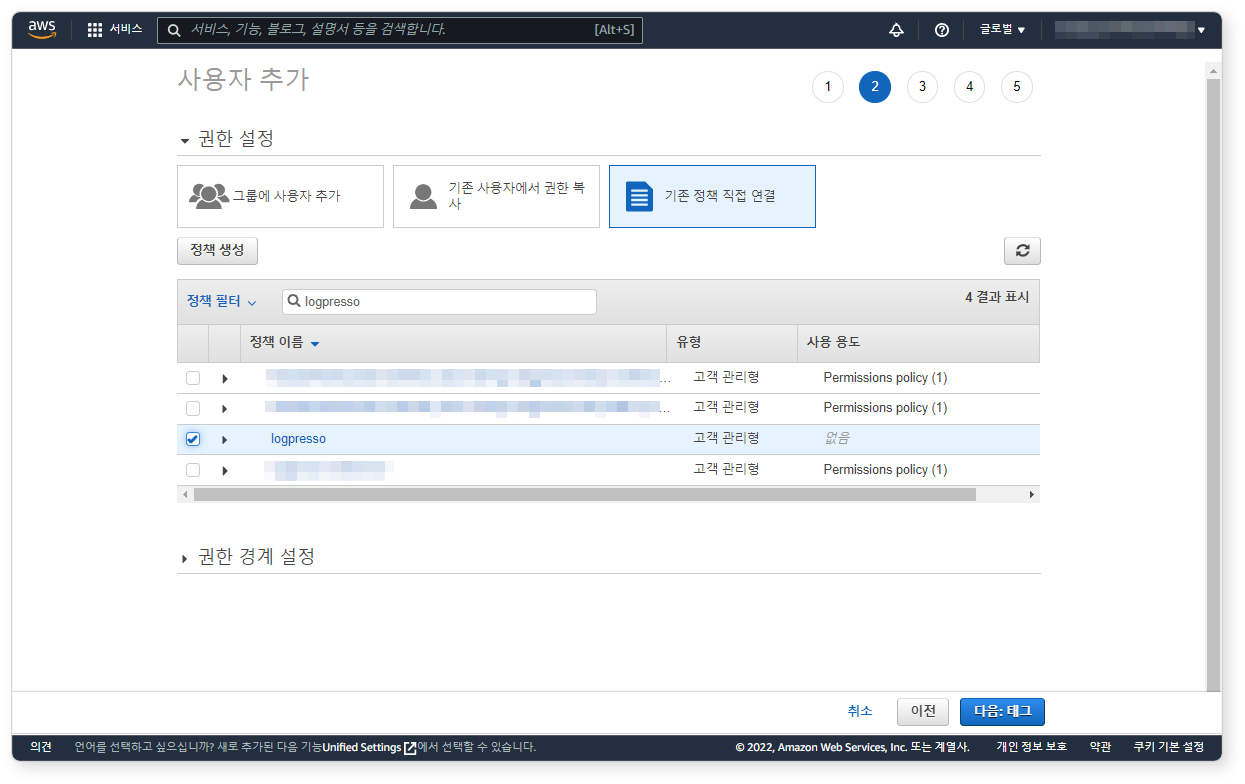
Step 2: Attach IAM Policy
Click Attach existing policies directly, select the logpresso policy you just created, then click Next: Tags.
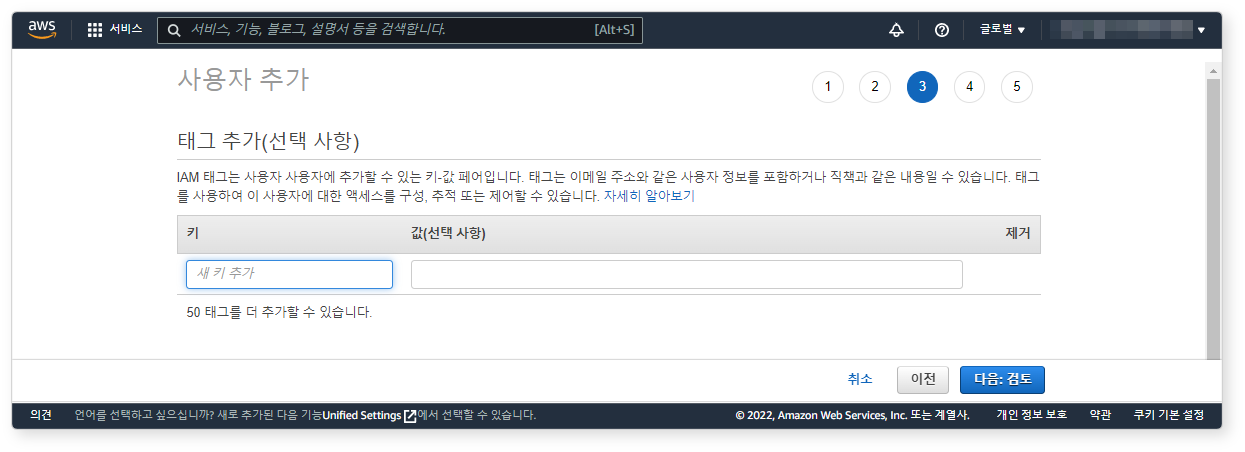
Step 3: Add User Tags (Optional)
Tags are optional. You may skip this step.
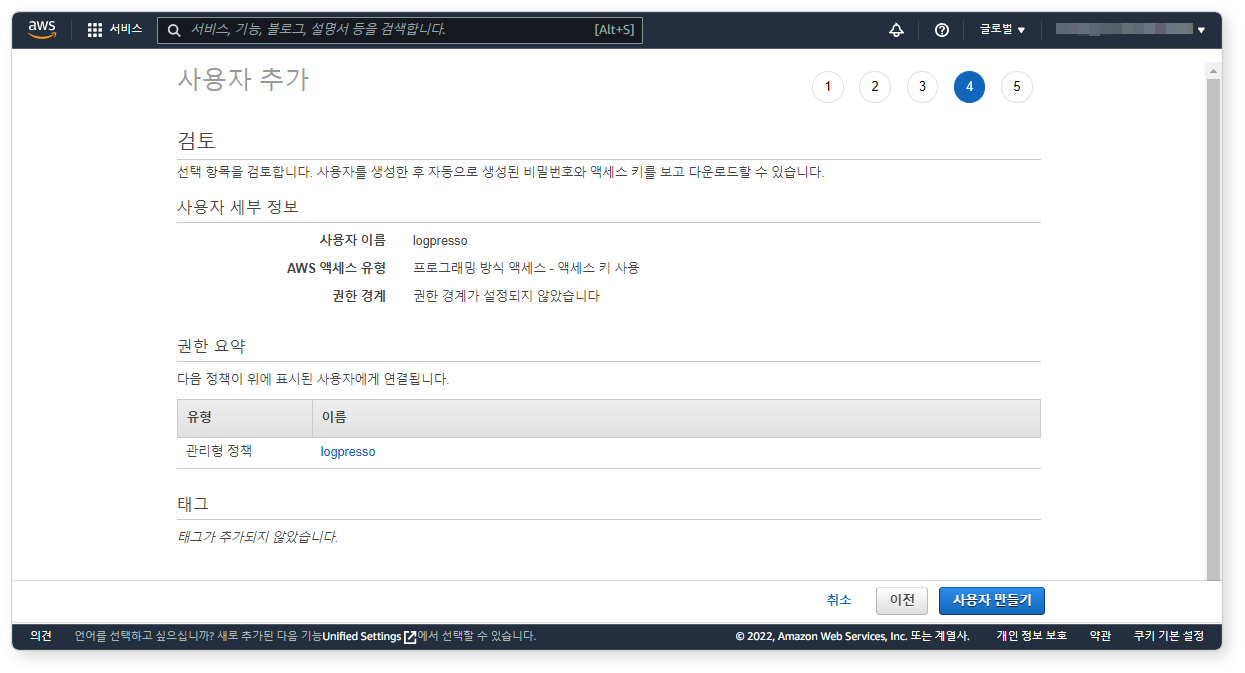
Step 4: Review and Create User
Verify the settings and click Create user.
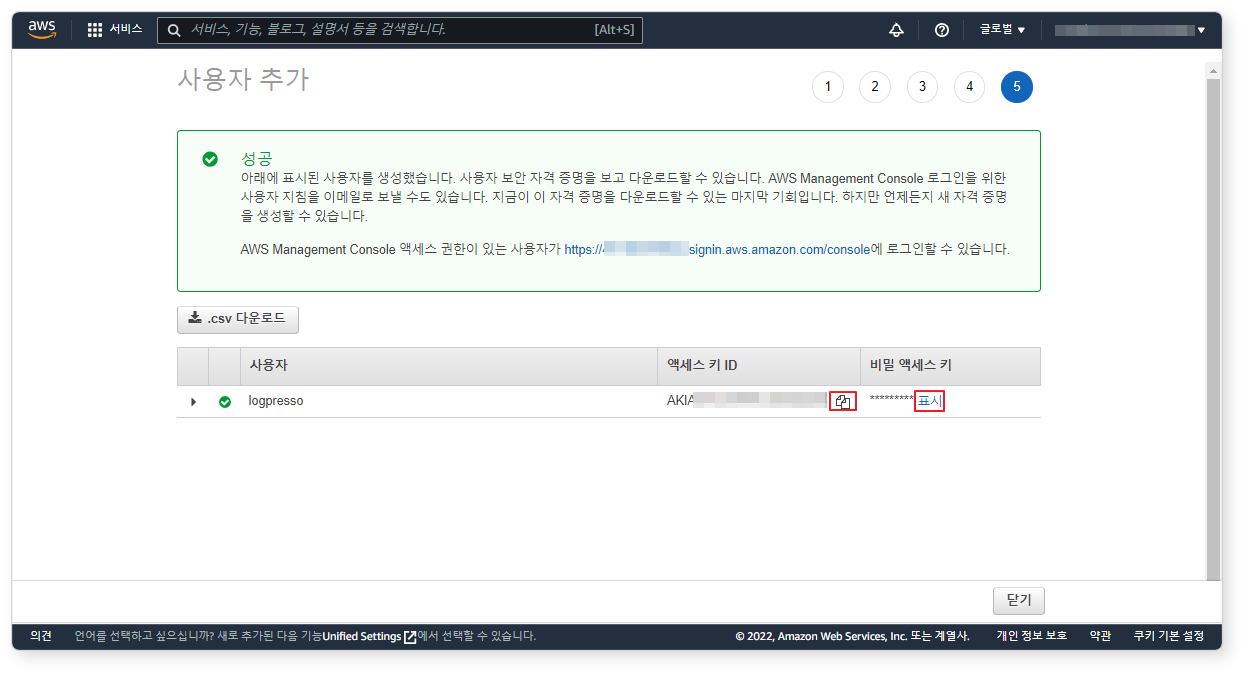
Step 5: Copy Access Key
Copy the Access Key ID and Secret Access Key and store them in a safe place. You will not be able to view the secret access key again after this step.
Configure AWS Aurora Log Collection
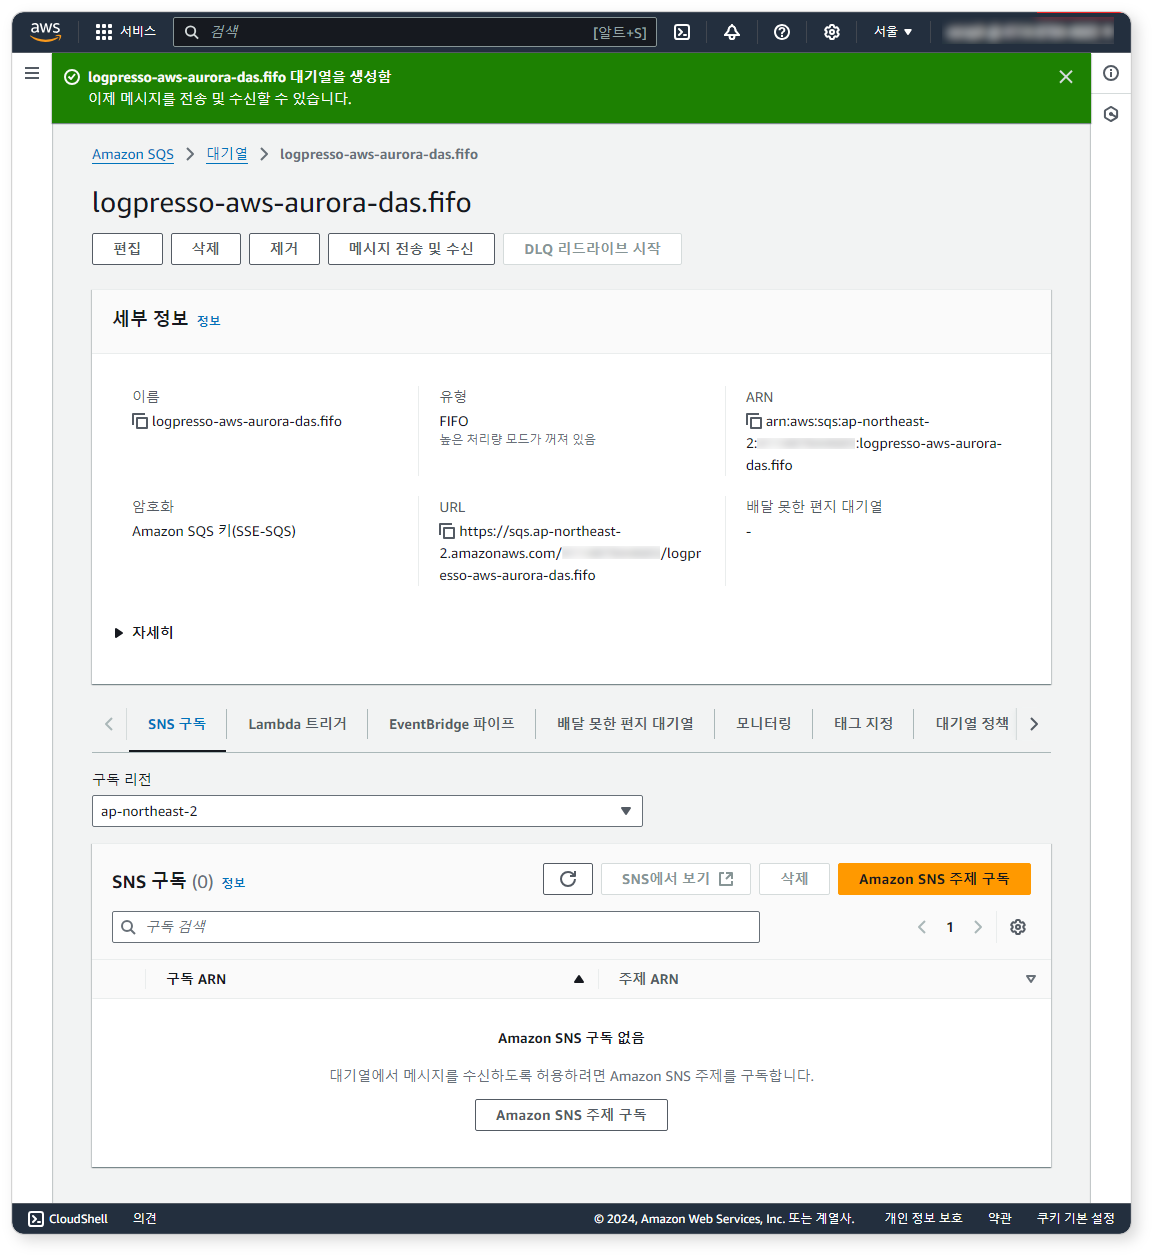
Step 1: Create SQS Queue
Use the following values for Type, Name, and Access Policy. All other options can be left as default or set according to your environment.
-
Type:
FIFO -
Name:
logpresso-aws-aurora-das.fifo -
Access Policy: Select
Advanced, and refer to the provided JSON to configure (modify REGION, ACCOUNT_ID appropriately){ "Version": "2012-10-17", "Id": "__default_policy_ID", "Statement": [ { "Sid": "__owner_statement", "Effect": "Allow", "Principal": { "AWS": "arn:aws:iam::ACCOUNT_ID:root" }, "Action": "SQS:*", "Resource": "arn:aws:sqs:REGION:ACCOUNT_ID:logpresso-aws-aurora-das.fifo" }, { "Sid": "__receiver_statement", "Effect": "Allow", "Principal": { "AWS": "arn:aws:iam::ACCOUNT_ID:user/logpresso" }, "Action": [ "SQS:ChangeMessageVisibility", "SQS:DeleteMessage", "SQS:ReceiveMessage" ], "Resource": "arn:aws:sqs:REGION:ACCOUNT_ID:logpresso-aws-aurora-das.fifo" } ] }
Step 2: Create Lambda Function
In the Lambda service:
- Select Author from scratch, and set:
- Function name: logpresso-aws-aurora-das-log-producer
- Runtime: Python 3.12
-
Click Create function.
-
After creation, replace the contents of lambda_function.py in the Code tab with the provided code. Modify the
sqs_queue_urlvariable to match your SQS queue URL.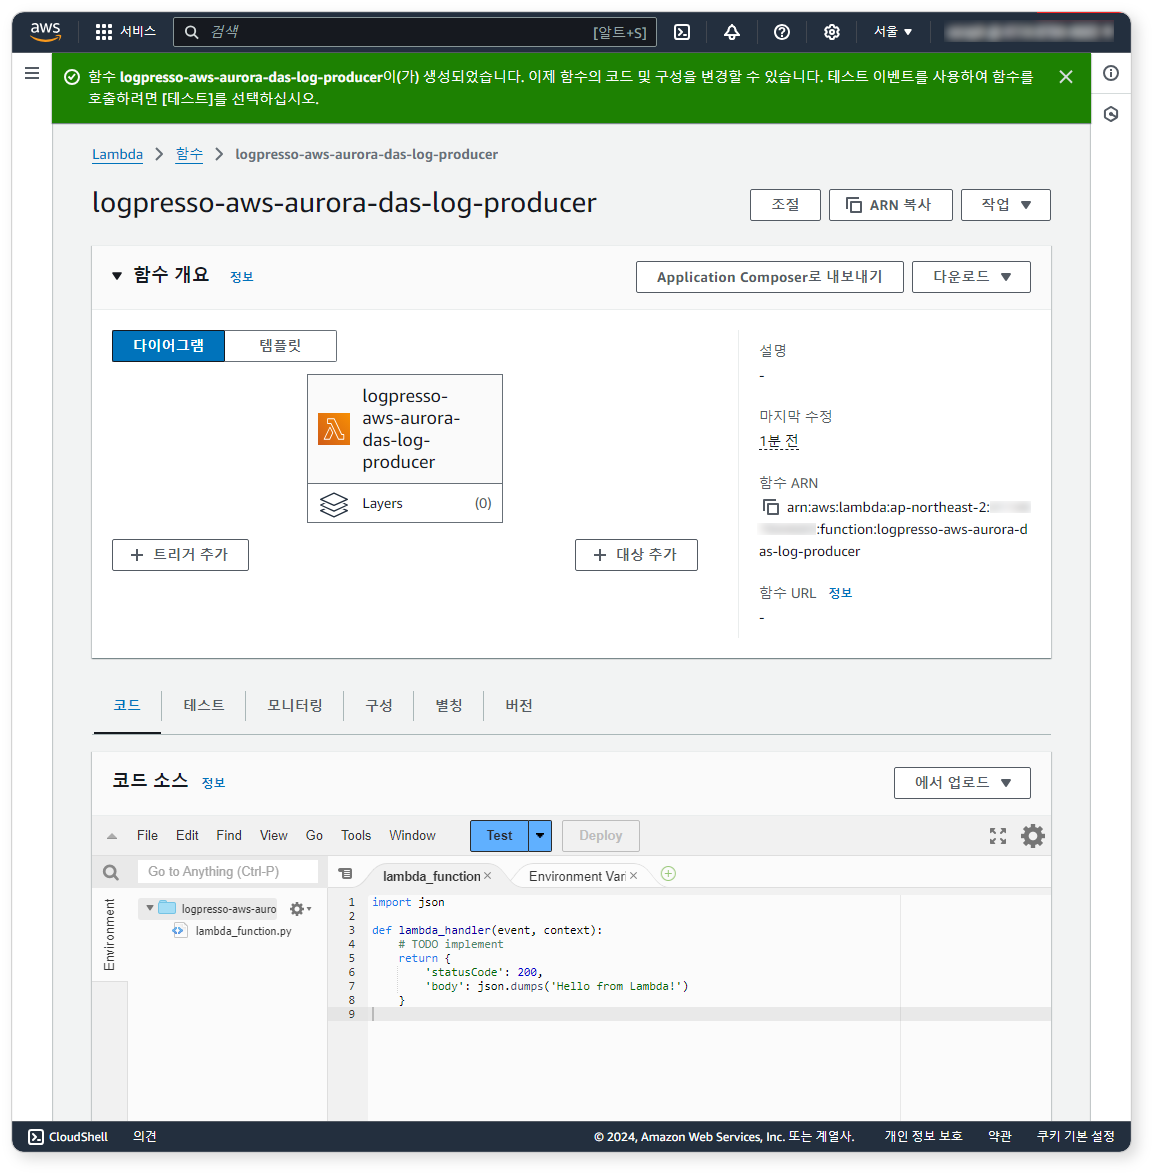
import json
import boto3
import gzip

s3_client = boto3.client('s3')
sqs_client = boto3.client('sqs')
sqs_queue_url = 'https://sqs.REGION.amazonaws.com/ACCOUNT_ID/QUEUE'

def lambda_handler(event, context):
    # process_s3_object('BUCKET_NAME', 'FILE_NAME')
    for record in event['Records']:
         bucket_name = record['s3']['bucket']['name']
         object_key = record['s3']['object']['key']
         process_s3_object(bucket_name, object_key)

    return {
        'statusCode': 200,
        'body': json.dumps('Completed')
    }

def process_s3_object(bucket_name, object_key):
    response = s3_client.get_object(Bucket=bucket_name, Key=object_key)
    data = gzip.decompress(response['Body'].read()).decode('utf-8')

    lines = data.splitlines()
    filtered = []
    i = 0
    for line in lines:
        try:
            i = i + 1
            log_entry = json.loads(line)

            # NOTE: Add your own filtering condition below
            if 'type' in log_entry:
                filtered.append(json.dumps(log_entry))
        except:
            print('error object key ' +  object_key + ' row #' + str(i))
            continue

    dup_id = 0
    if filtered:
        max_message_size = 128 * 1024  # 128KB
        current_message = []
        current_size = 0

        for log in filtered:
            log_size = len(log.encode('utf-8')) + 1
            if current_size + log_size > max_message_size:
                send_message_to_sqs(sqs_queue_url, "\n".join(current_message), object_key, dup_id)
                dup_id = dup_id + 1
                current_message = [log]
                current_size = log_size
            else:
                current_message.append(log)
                current_size += log_size

        if current_message:
            send_message_to_sqs(sqs_queue_url, "\n".join(current_message), object_key, dup_id)
            dup_id = dup_id + 1


def send_message_to_sqs(queue_url, message_body, object_key, dup_id):
    message_group_id = 'logpresso'
    message_deduplication_id = object_key.split('/')[-1]

    response = sqs_client.send_message(
        QueueUrl=queue_url,
        MessageBody=message_body,
        MessageGroupId=message_group_id,
        MessageDeduplicationId=object_key + str(dup_id)
    )

    print(response)
    return response
Step 3: Test Lambda Function with Simulated Event
Click Test, create a test event as shown:
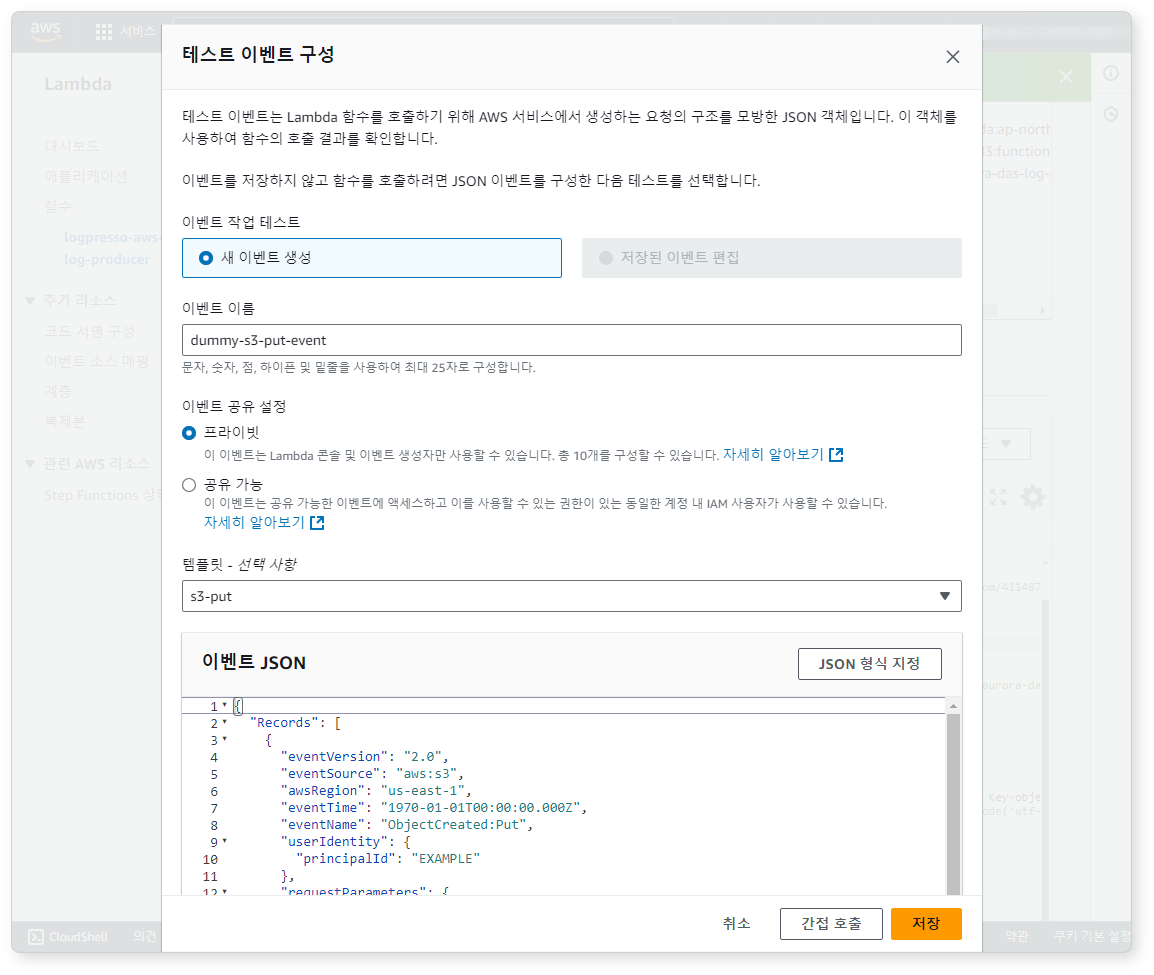
Run it using Invoke to verify functionality.
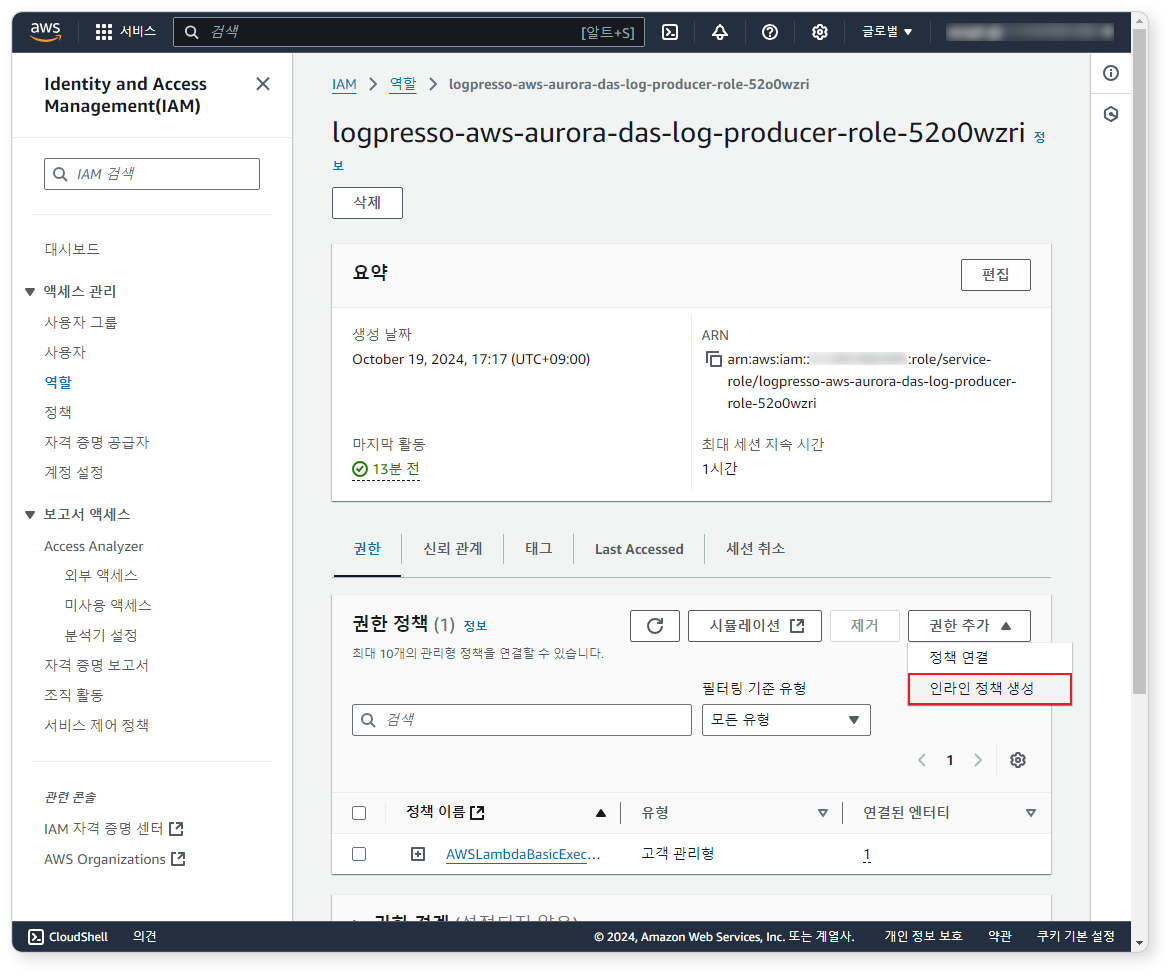
Step 4: Add Lambda Inline Policy
If the test runs successfully, add the permissions required for the Lambda function to access S3.
-
In the Configuration tab, click the Execution role name to move to the IAM service.
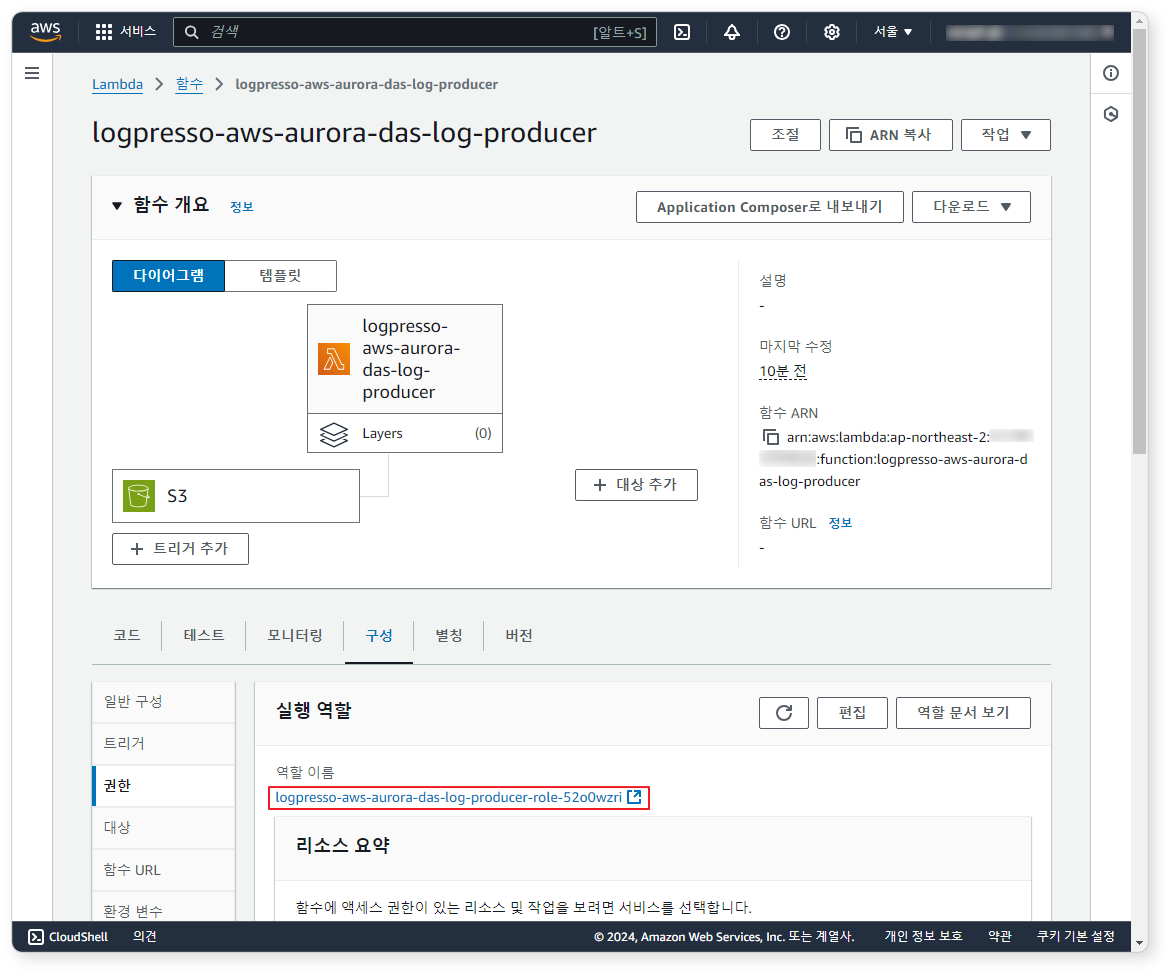
-
Click Add permissions > Create inline policy.
-
In the policy editor, paste the provided JSON and replace REGION, ACCOUNT_ID, BUCKET_NAME, and QUEUE with your environment values.
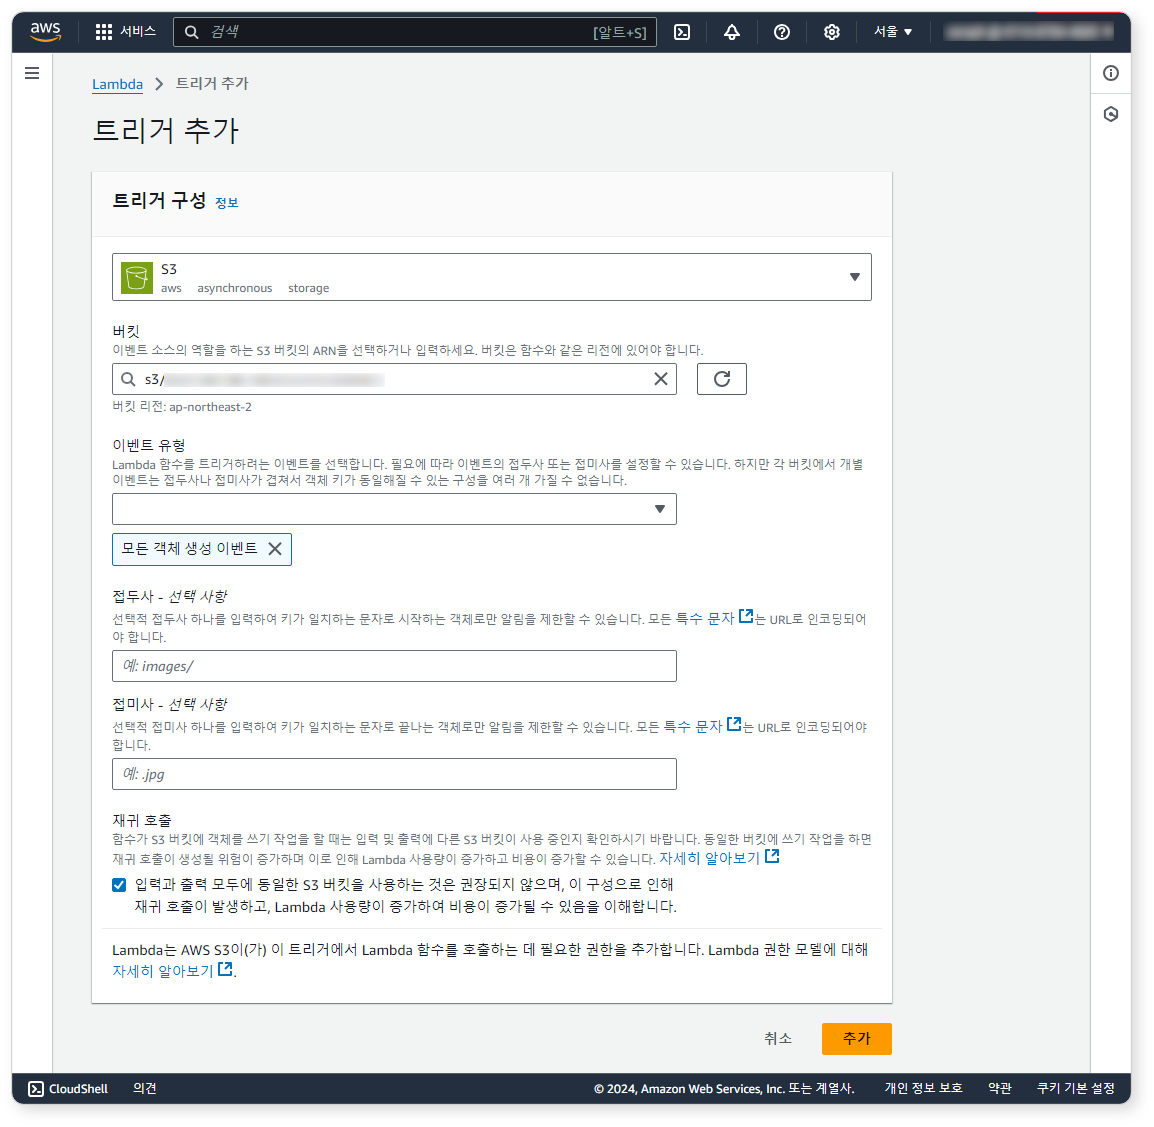
Step 5: Add Lambda Trigger
Add a trigger so the Lambda function runs when new log files are added to S3.
- In the Function overview, click Add trigger.
- In the Add trigger screen:
-
Select S3
-
Set Event type to All object create events
-
Acknowledge the warning and click Add
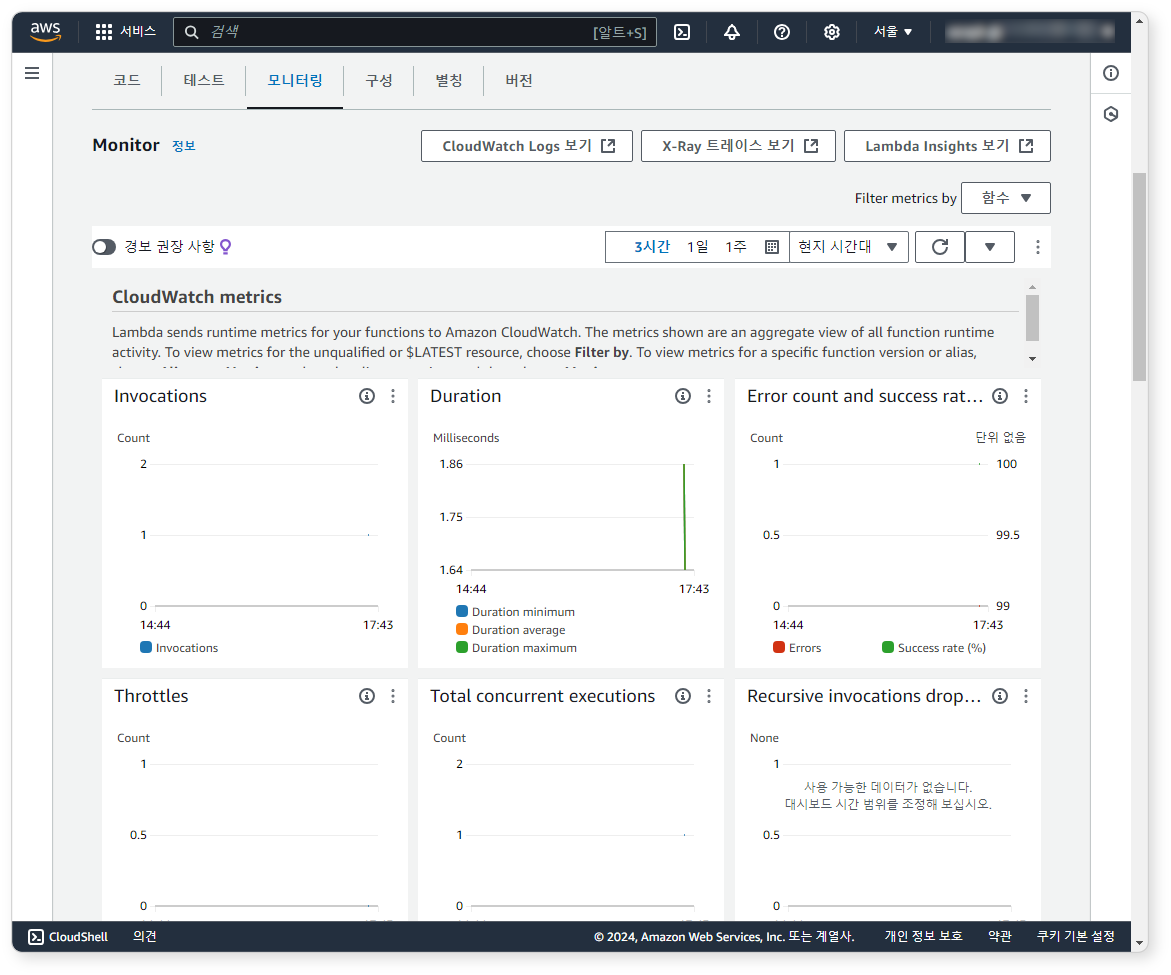
Step 6: Verify Execution
Go to the Monitoring tab and confirm that the Lambda function is triggered when logs are written to S3.
Configure Connection Profile
After installing and launching the AWS app, go to Settings > Connection Profiles.
Step 1: Add Connection Profile
Refer to this guide to create a new profile.

Required fields are highlighted in light blue:
- Name: Unique identifier for the profile
- Code: Identifier used in queries
- Type:
AWS - Authentication Type: Access Key
- Client Region: e.g., ap-northeast-2 (multiple regions can be separated by commas)
- Access Key ID: Copied from IAM user
- Secret Access Key: Copied from IAM user
After saving the profile, you can use AWS extended commands.
AWS CloudTrail Logs
Refer to this guide to add a logger. To encrypt logs, you must first create an encrypted table via Settings > Tables.
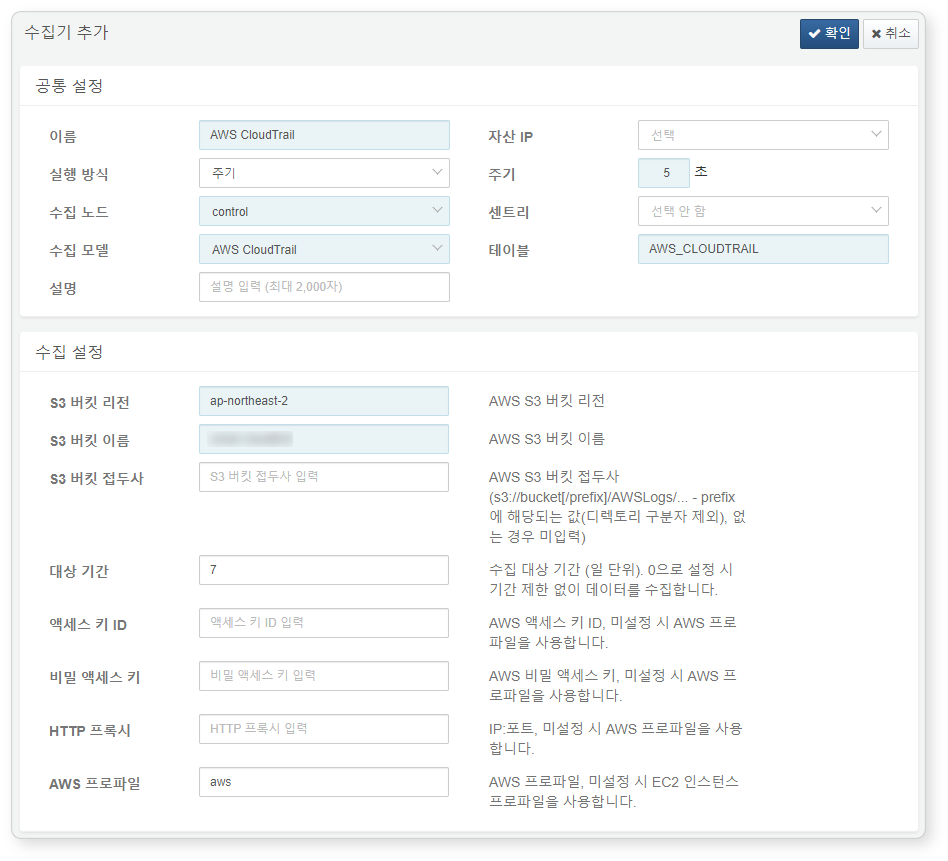
Required fields are highlighted in light blue:
-
Name: Unique name to identify the logger
-
Interval: 5 seconds
-
Storage: Select a node based on your Logpresso configuration.
-
Logger model:
AWS CloudTrail -
Table: Use a table name starting with
AWS_CLOUDTRAIL. -
S3 Bucket Region: Region of the S3 bucket containing AWS CloudTrail logs
-
S3 Bucket Name: Name of the S3 bucket
-
Target Period: Log period range to collect (default: 0)
-
AWS Profile: AWS Connection profile name
AWS GuardDuty Logs
You can configure log export in the GuardDuty console by enabling Export Findings to S3. The AWS GuardDuty logger collects logs stored in the S3 bucket.

Required fields are highlighted in light blue:
-
Name: Unique name to identify the logger
-
Interval: 5 seconds
-
Storage: Select a node based on your Logpresso configuration.
-
Logger model:
AWS GuardDuty -
Table: Use a table name starting with
AWS_GuardDuty. -
S3 Bucket Region: Region of the S3 bucket containing AWS GuardDuty logs
-
S3 Bucket Name: Name of the S3 bucket
-
Target Period: Log period range to collect (default: 0)
-
AWS Profile: AWS Connection profile name
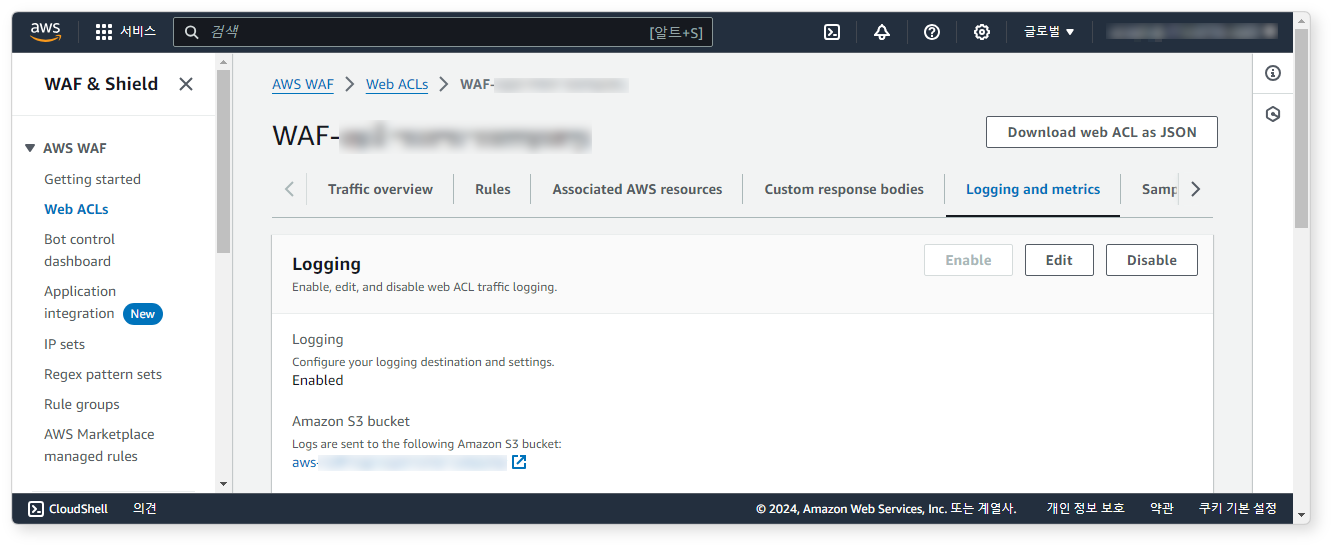
AWS WAF Logs
First, go to the AWS WAF console, then navigate to Web ACLs > Logging and metrics and configure logging to an S3 bucket.
Refer to this guide to add a logger.
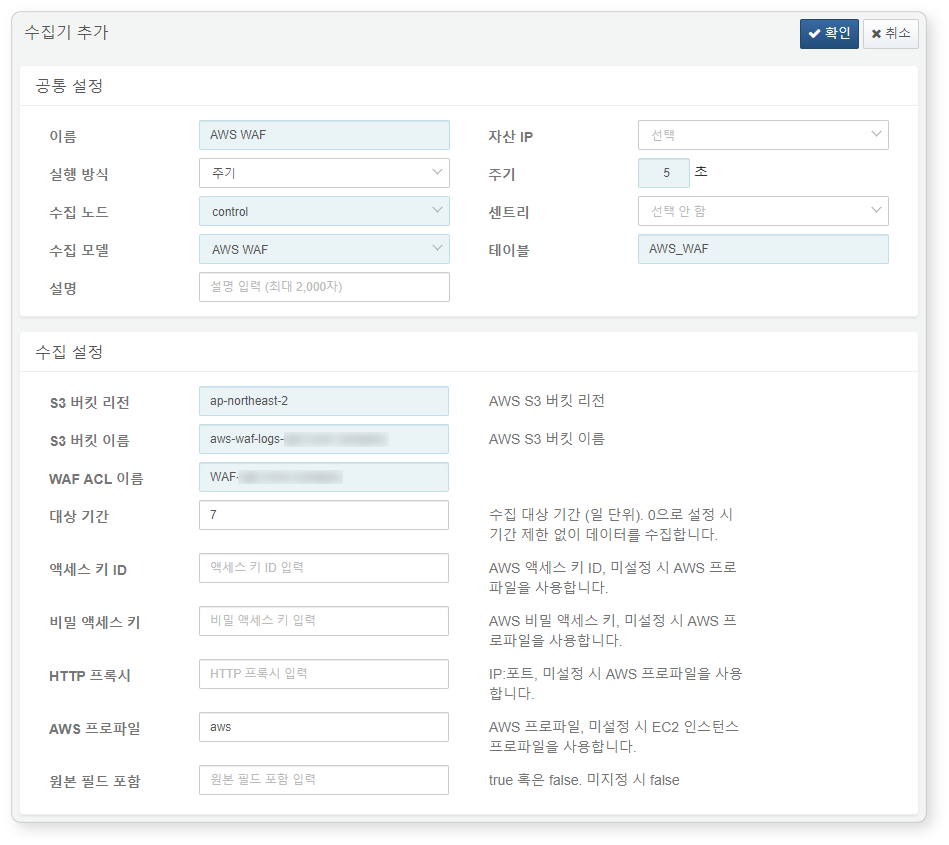
Required fields are highlighted in light blue:
-
Name: Unique name to identify the logger
-
Interval: 5 seconds
-
Storage: Select a node based on your Logpresso configuration.
-
Logger model::
AWS WAF -
Table: Use a table name starting with
AWS_WAF. -
S3 Bucket Region: Region of the S3 bucket containing AWS WAF logs
-
S3 Bucket Name: Name of the S3 bucket
-
WAF ACL Name: Name of the Web ACL
-
Target Period: Log period range to collect (default: 0)
-
AWS Profile: AWS Connection profile name
AWS Shield Logs

Required fields are highlighted in light blue:
-
Name: Unique name to identify the logger
-
Interval: 5 seconds
-
Storage: Select a node based on your Logpresso configuration.
-
Logger model:
AWS Shield -
Table: Use a table name starting with
AWS_SHIELD. -
AWS Profile: AWS Connection profile name
AWS ALB Logs
In the Attributes tab of the AWS Load Balancer, enable access logging and configure it to store logs in an S3 bucket. The AWS ALB logger collects access logs stored in the S3 bucket.
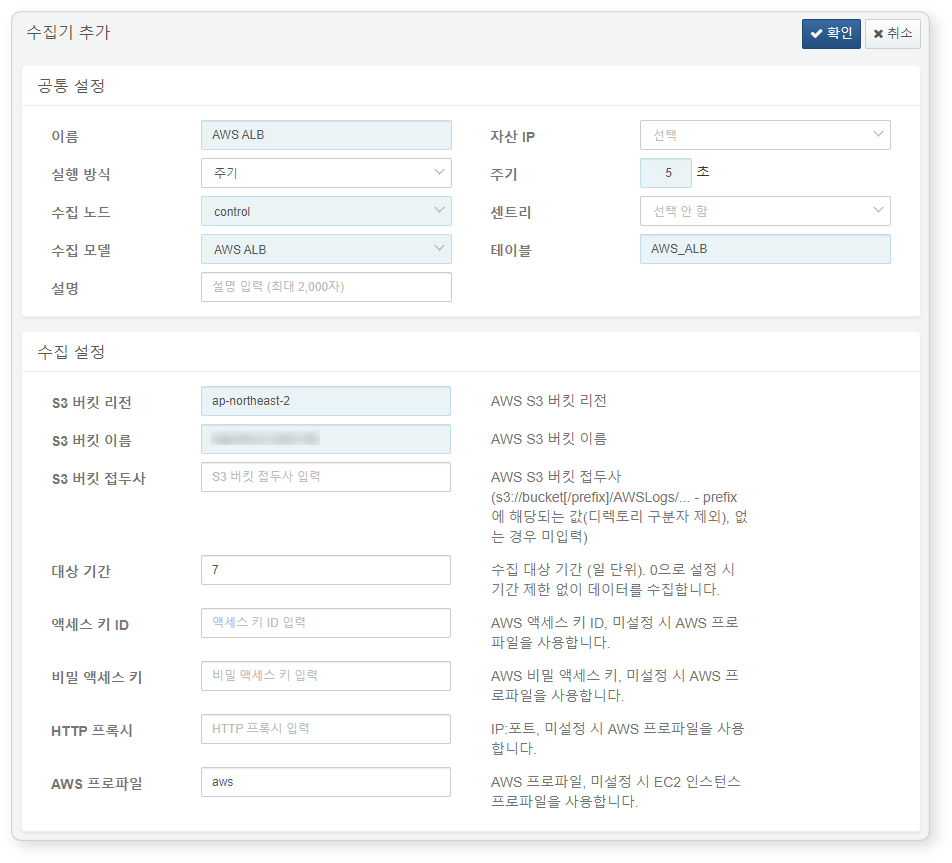
Required fields are highlighted in light blue:
-
Name: Unique name to identify the logger
-
Interval: 5 seconds
-
Storage: Select a node based on your Logpresso configuration.
-
Logger model:
AWS ALB -
Table: Use a table name starting with
AWS_ALB. -
S3 Bucket Region: Region of the S3 bucket containing AWS ALB logs
-
S3 Bucket Name: Name of the S3 bucket
-
Target Period: Log period range to collect (default: 0)
-
AWS Profile: AWS Connection profile name
AWS Aurora DB Logs
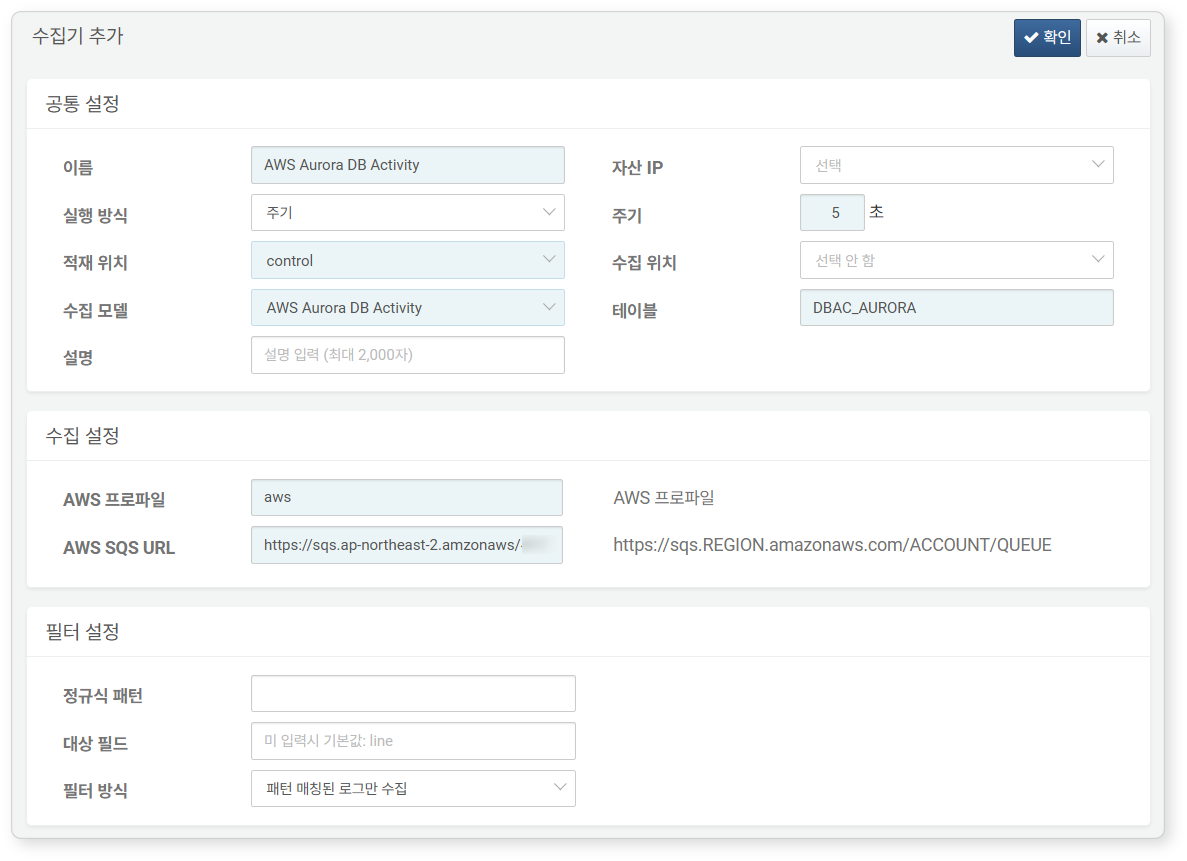
Required fields are highlighted in light blue:
-
Name: Unique name to identify the logger
-
Interval: 5 seconds
-
Storage: Select a node based on your Logpresso configuration.
-
Logger model:
AWS Aurora DB Activity -
Table: Use a table name starting with
DBAC_AURORA. -
AWS Profile: AWS Connection profile name
-
AWS SQS URL: AWS SQS endpoint URL (e.g.,
https://sqs.ap-northeast-2.amazonaws.com/ACCOUNT_ID/logpresso-aws-aurora-das.fifo)
All installation steps are now complete.
Check the Loggers menu to verify that data is being collected, and go to the dashboard to view results.