Install Guide
When the app is first launched, the dashboards may appear empty. You must complete the logger setup after the initial app installation.
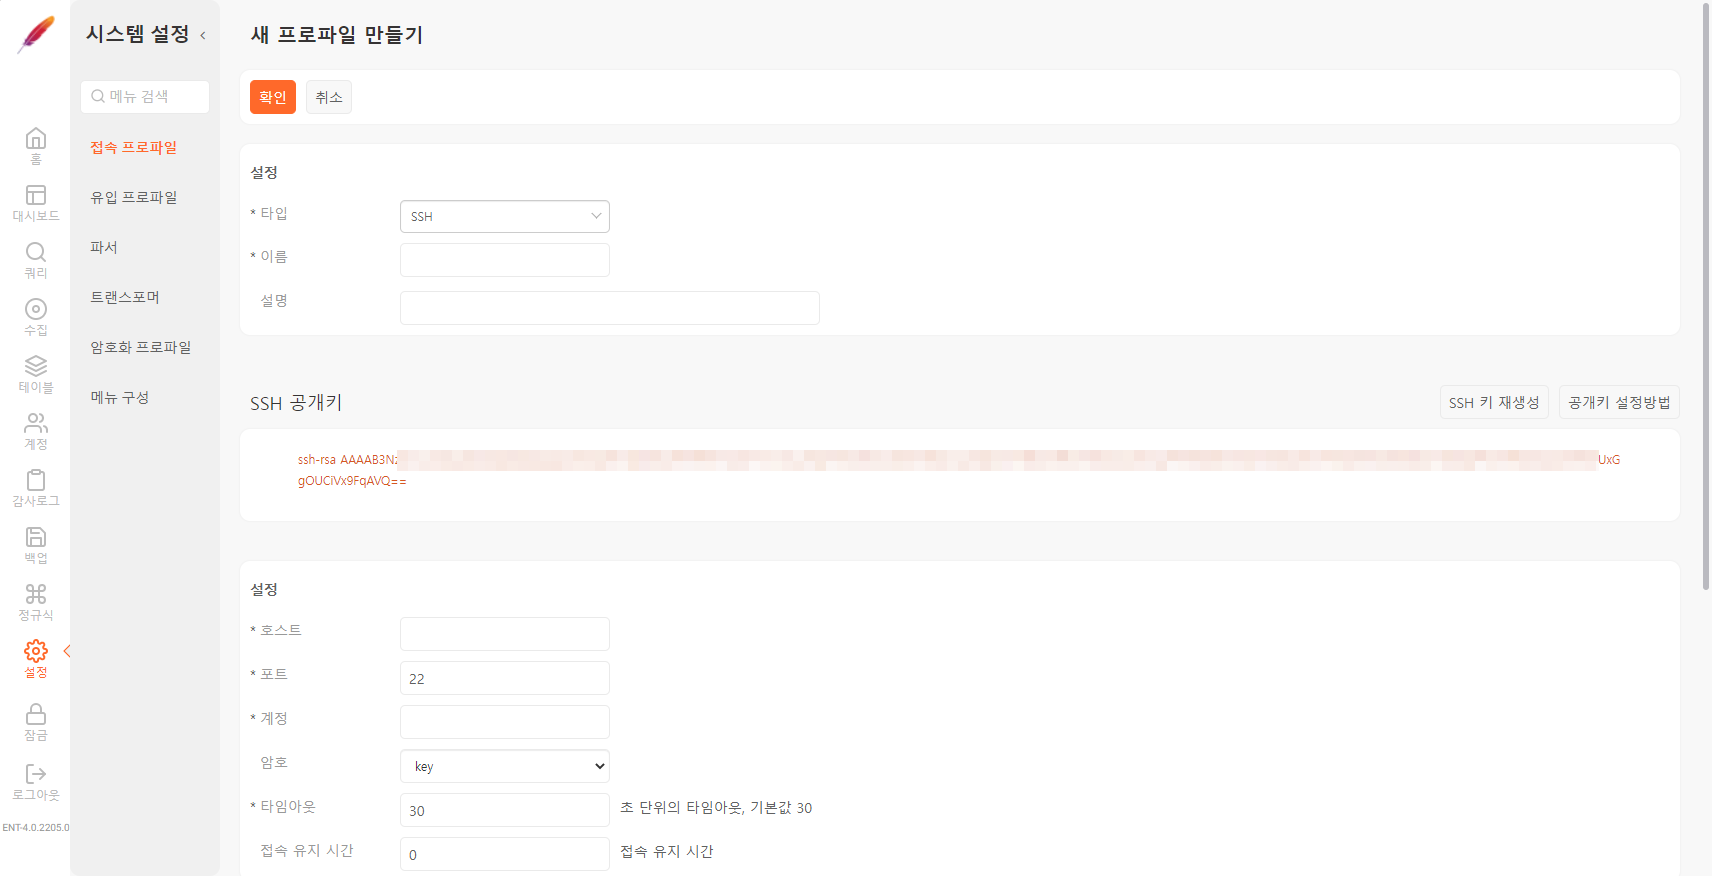
Configure Connection Profile
Refer to this guide to create a connection profile.
Required fields are highlighted in light blue:
- Name: Unique name for the connection profile
- Code: Identifier used in queries or loggers to reference the profile
- Type: SSH
- Host: IP address or hostname of the Apache HTTP server
- Port: SSH port (default: 22)
- User: SSH login username
- Authentication Type: Choose between Authentication Key (recommended) or Password
- Timeout: Maximum connection wait time (default: 30 seconds)
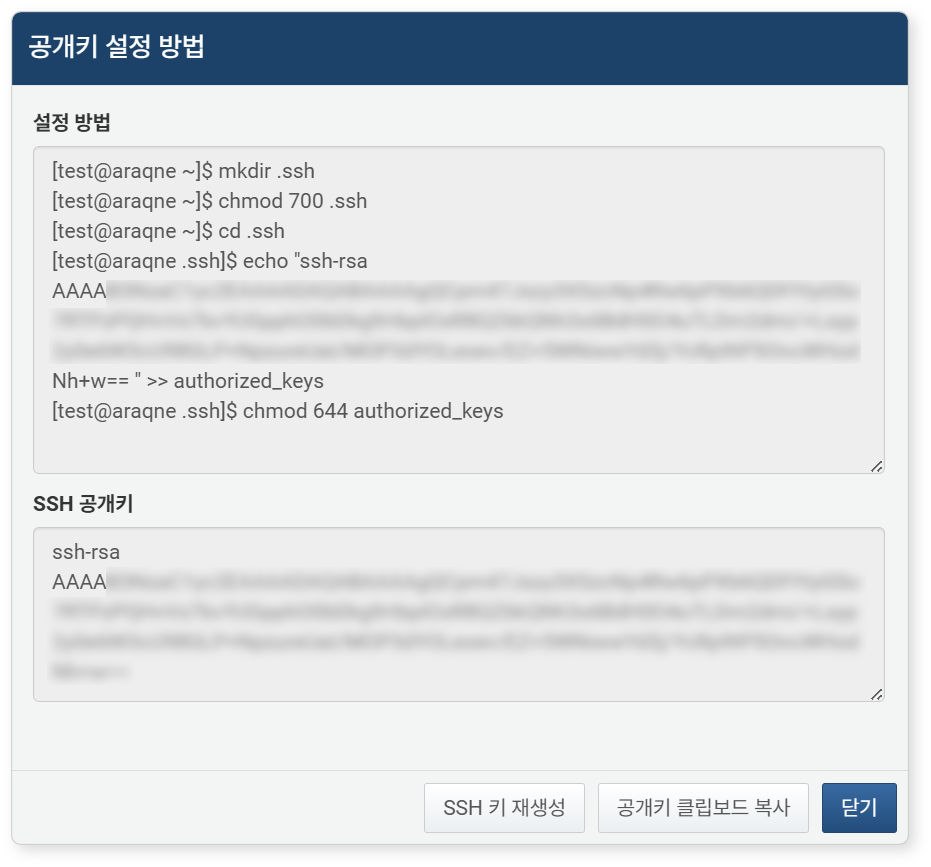
Click Set Public Key to display the steps for enabling key-based SSH authentication and to view your public key:
By default, Apache HTTP Server stores logs under /var/log/httpd. Ensure the Logpresso login user is added to the same group as the log files, so that they are readable. To verify access, run the following test query:
If the content is returned, the account has sufficient permissions.
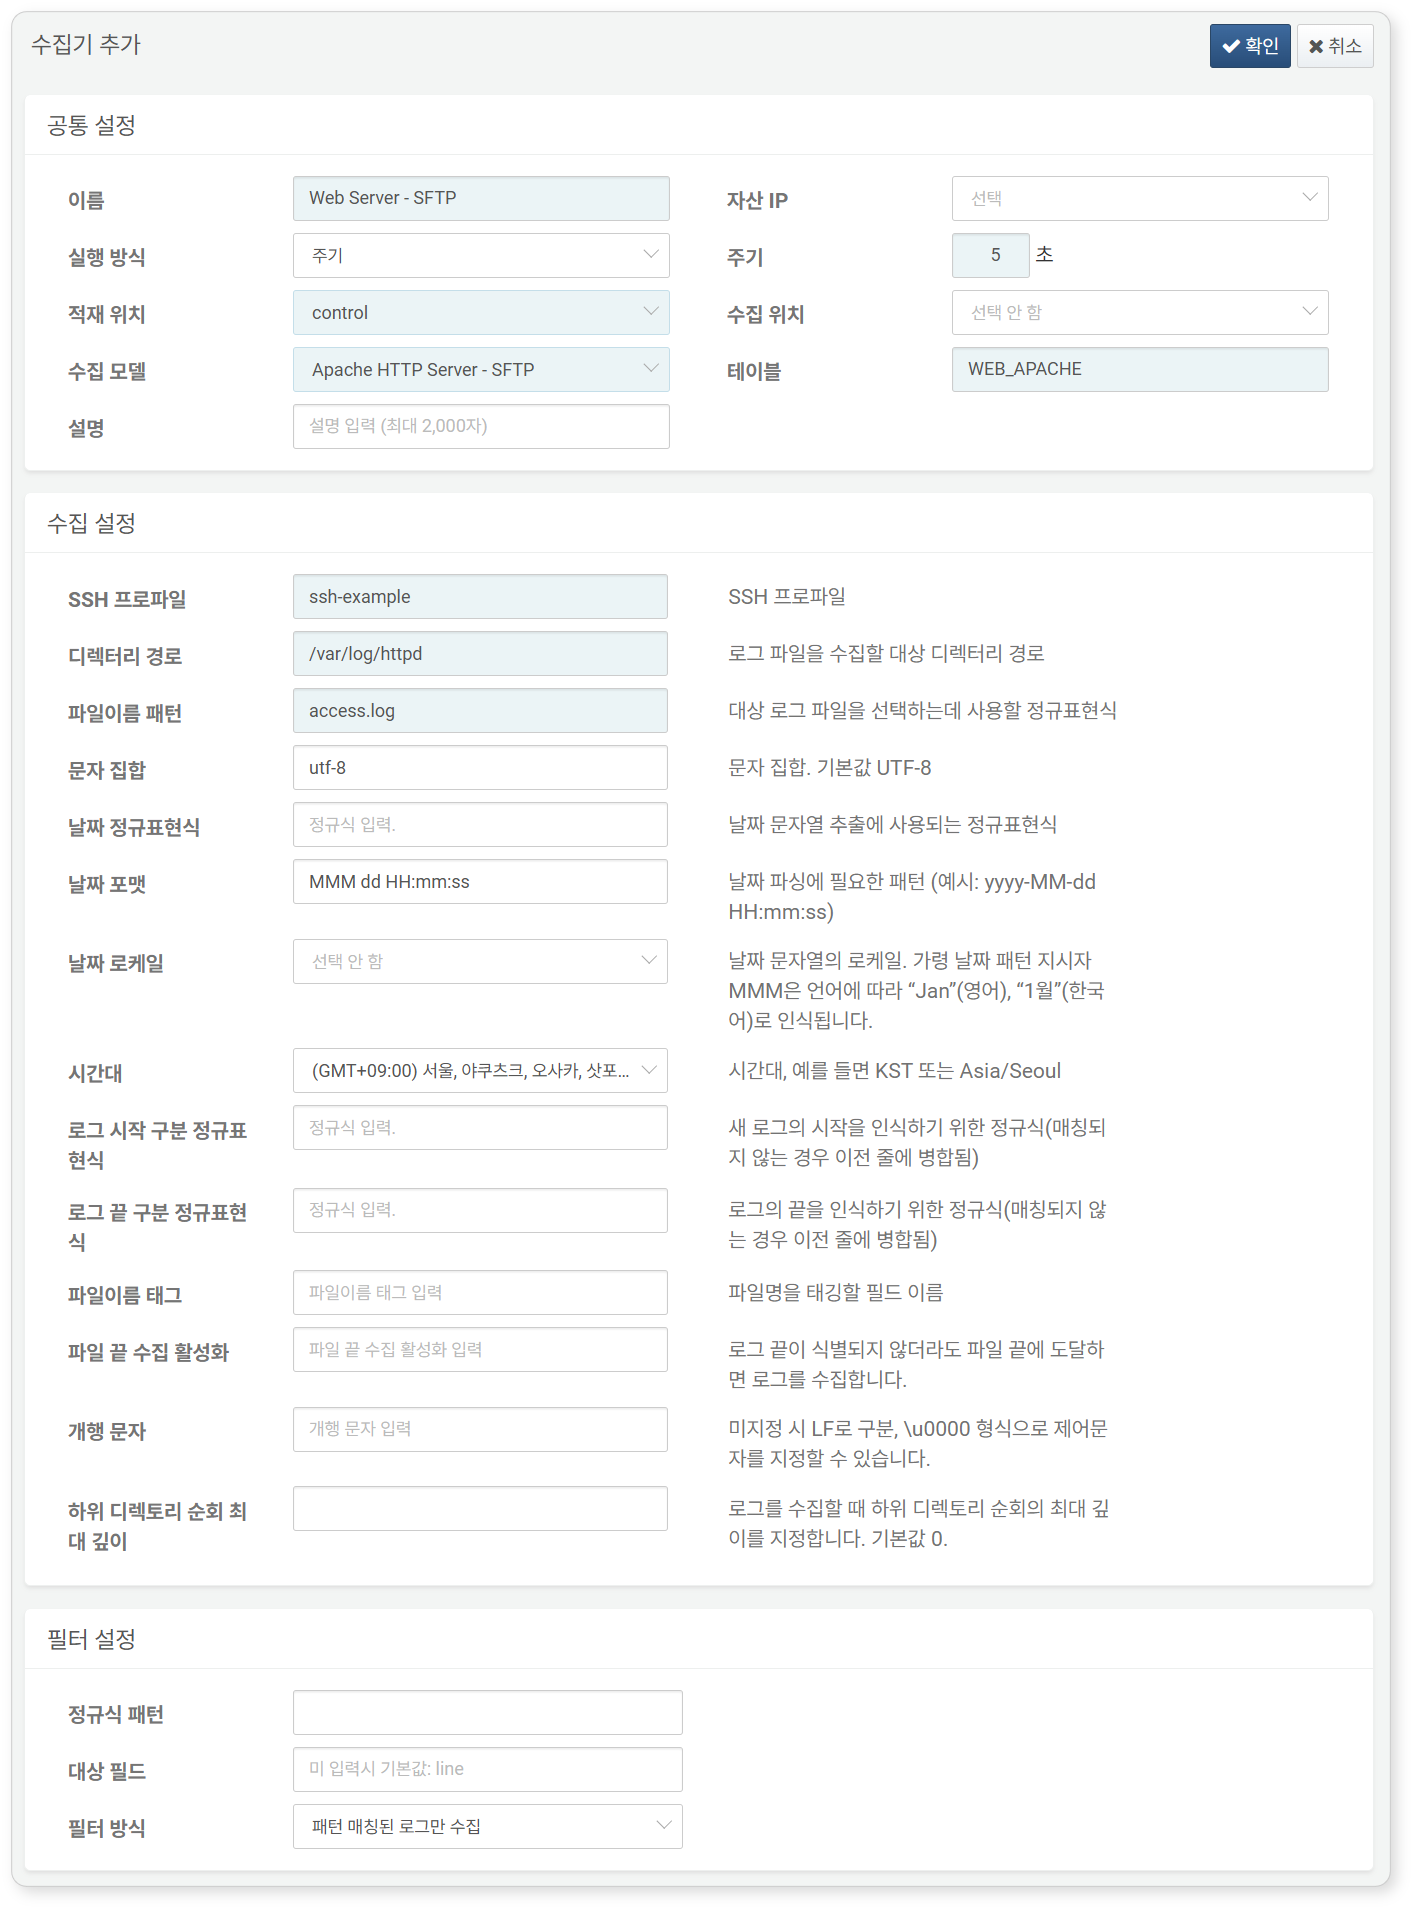
Set Up Logger
Refer to this guide to configure the logger. Default dashboards and datasets reference tables prefixed with WEB_APACHE.
Required fields are highlighted in light blue:
- Name: Unique name for the logger
- Interval: 5 seconds
- Storage: Select an appropriate node based on your Logpresso configuration.
- Logger Model: Apache HTTP Server – SFTP
- Table: Use a name starting with WEB_APACHE
- SSH Profile: Use the identifier of the connection profile created earlier
- File Path: Full path to the log directory on the Apache HTTP server
Once complete, return to the dashboard to view the collected results.


