Install Guide
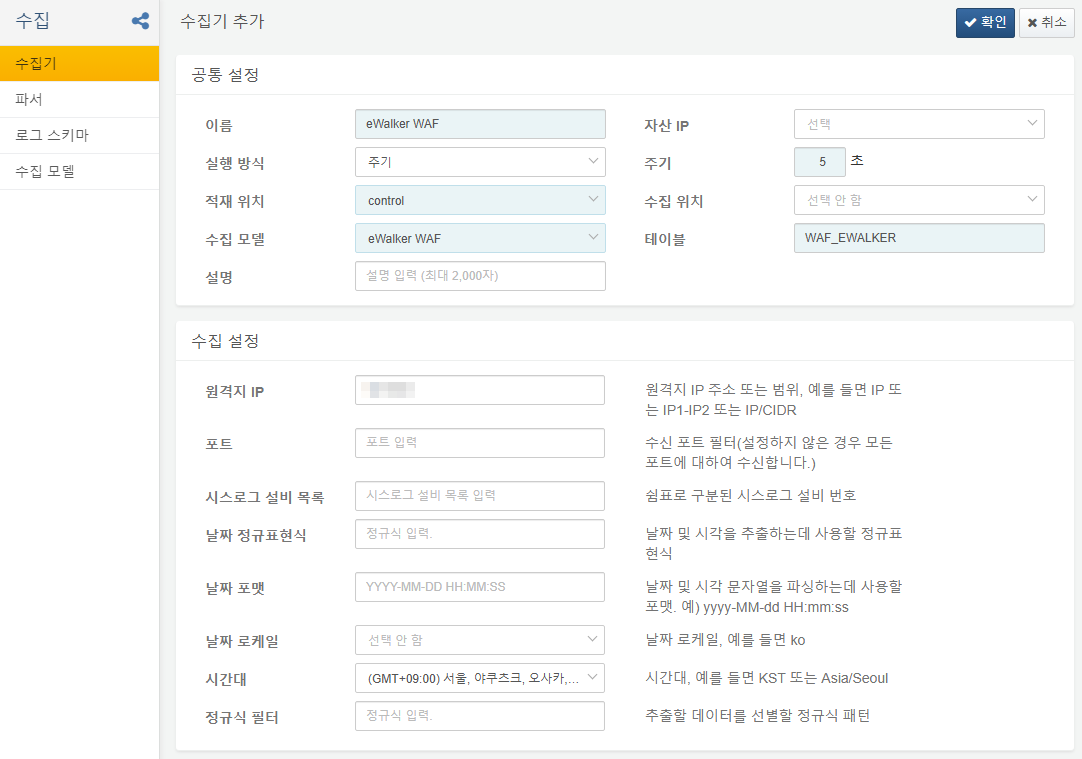
Set Up Logger
Select the eWalker WAF as a logger model and enter the remote IP address. This configuration will ensure that logs sent from the origin address are stored in the WAF_EWALKER table.
eWalker WAF Blocklist Integration
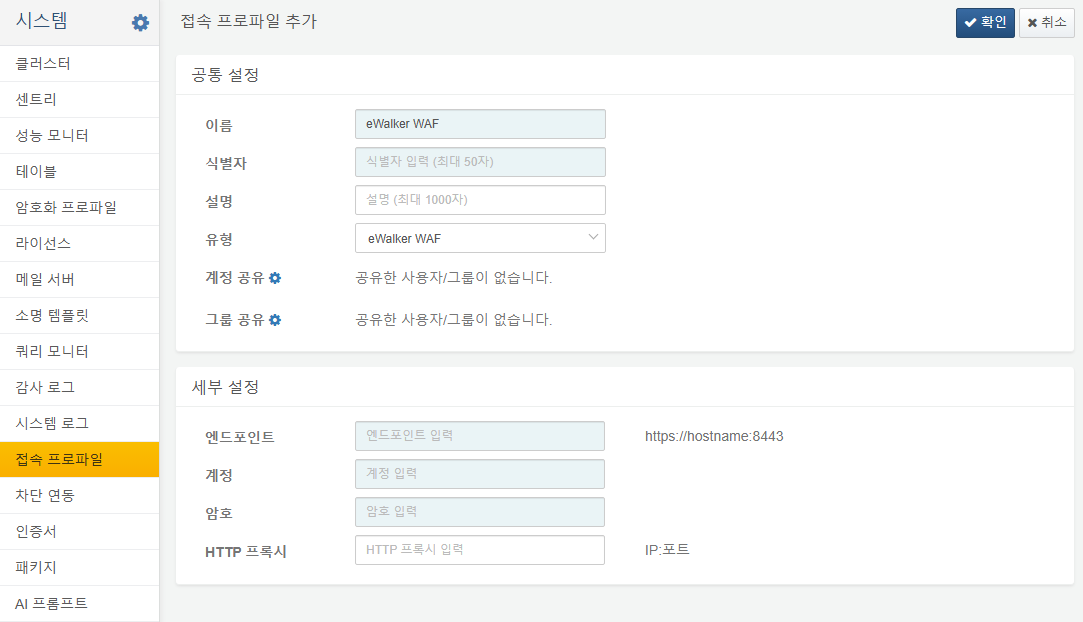
To configure Logpresso to call and control the eWalker WAF API, you must first set up an eWalker WAF connect profile in Logpresso. Follow these steps:
- Endpoint: Endpoint in the format
https://IP:8443 - Account: eWalker WAF administrator account
- Password: Administrator account password
- HTTP Proxy: If needed, enter the proxy in the format
IP:port.
Verify the functionality of the extended query command. First, log into the eWalker WAF web console and check the list in the ACL Policies menu. Logpresso will synchronize the IP blocklist to the ACL policy in eWalker WAF. For the actual blocking to work, the ACL policy in eWalker WAF must be correctly configured to reference the address group in Logpresso.
Run the ewalker-waf-acl-policies query in Logpresso to ensure the API call is working correctly.
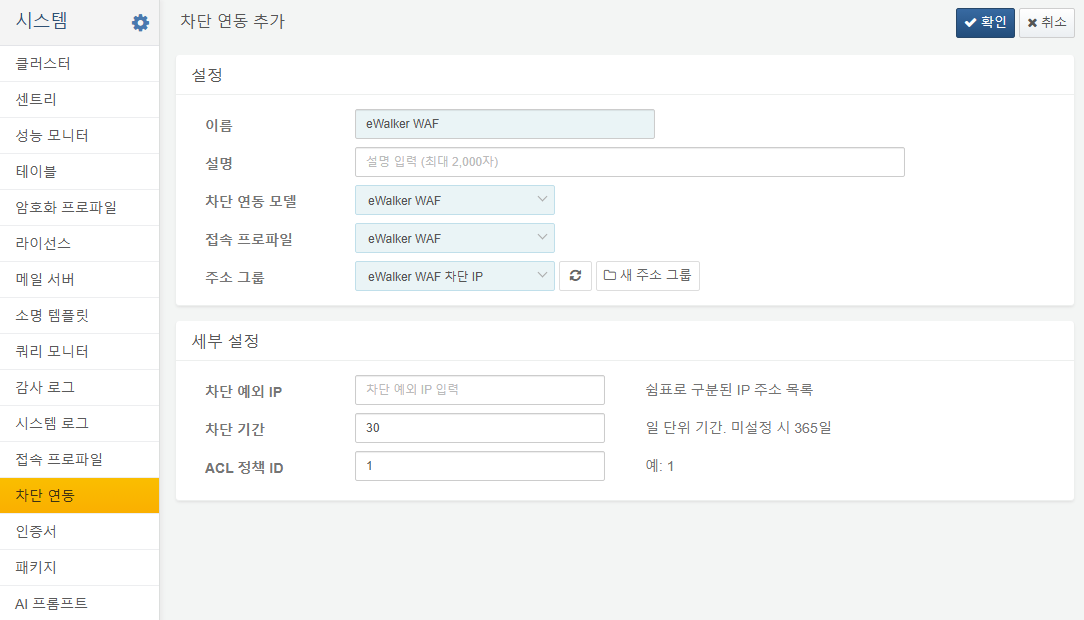
Set up the blocking integration to synchronize the address groups in Logpresso with the ACL policies in eWalker WAF.
- Block Exception IP: Set to include the Logpresso server address, eWalker WAF device address, and critical server IP addresses to prevent blocking of essential services.
- Block Period: Set the expiration period for blocked IPs in the eWalker WAF ACL policy. Typically, this should be set longer than the expiration period of the corresponding data source’s address group.
- ACL Policy ID: Enter the
acl_idvalue from the query in the previous step.
Finally, add a test IP address to the Logpresso address group, verify that it is registered in the ACL policy in eWalker WAF, and complete the setup.


