Install Guide
Create eStreamer Client: Cisco Secure Firewall Management Center
Before eStreamer can send events to a client, you need to add the client to the eStreamer server's database. Then you need to copy the authentication certificate generated by the eStreamer server to the client.
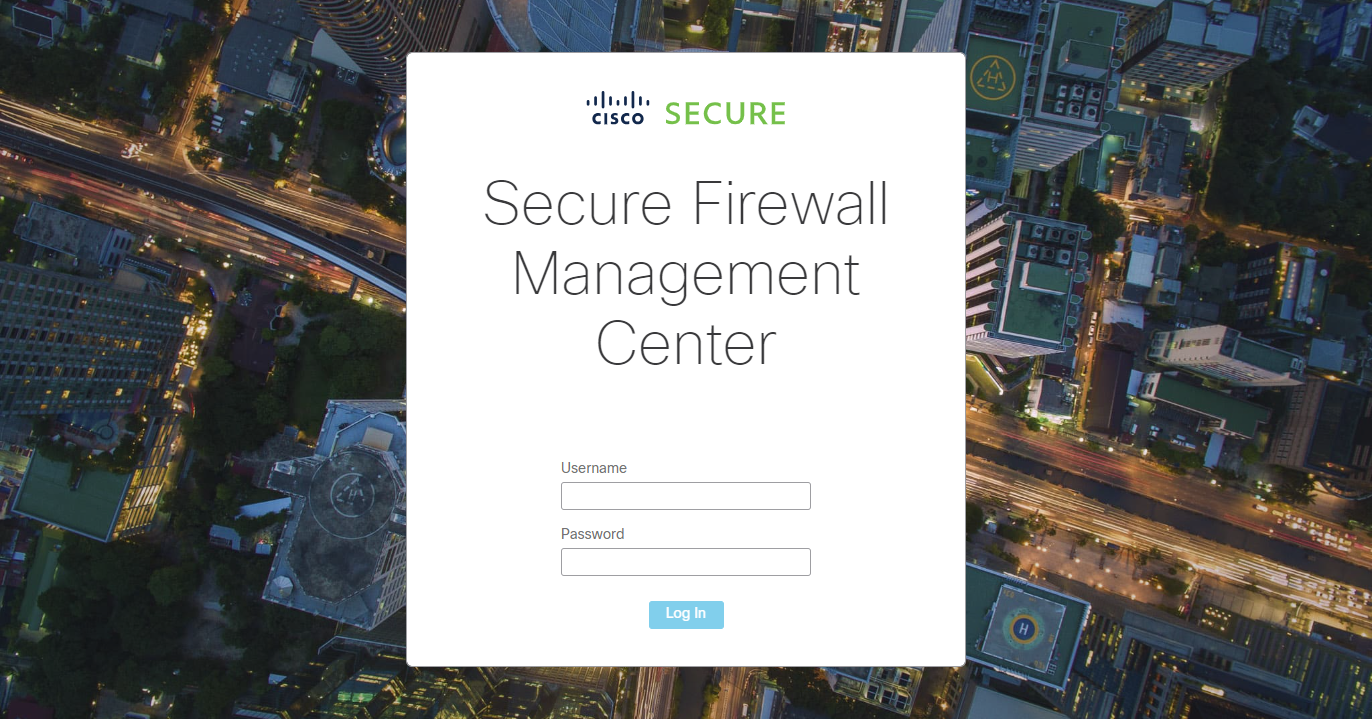
First, log in to the Cisco Secure Firewall Management Center.
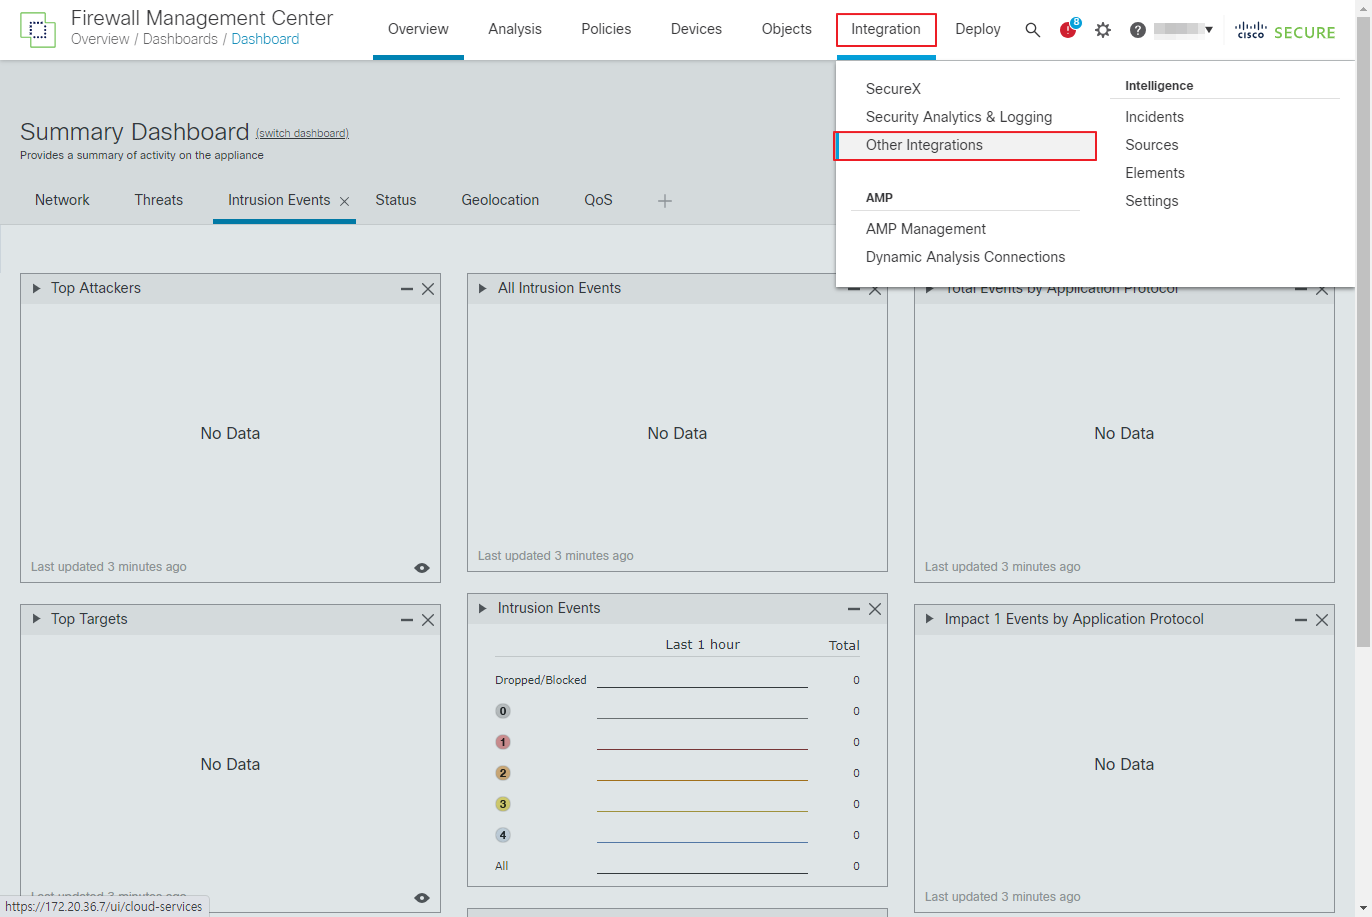
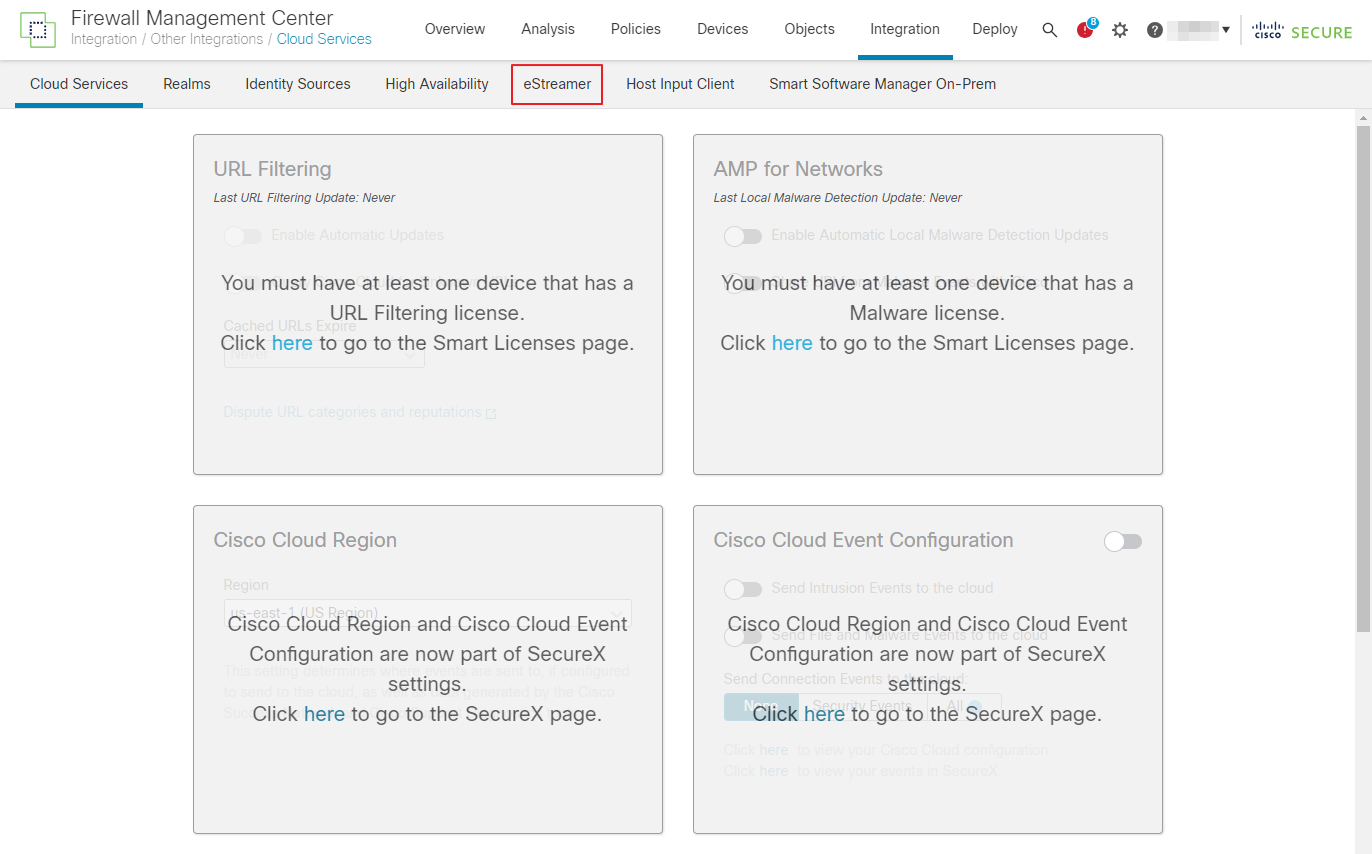
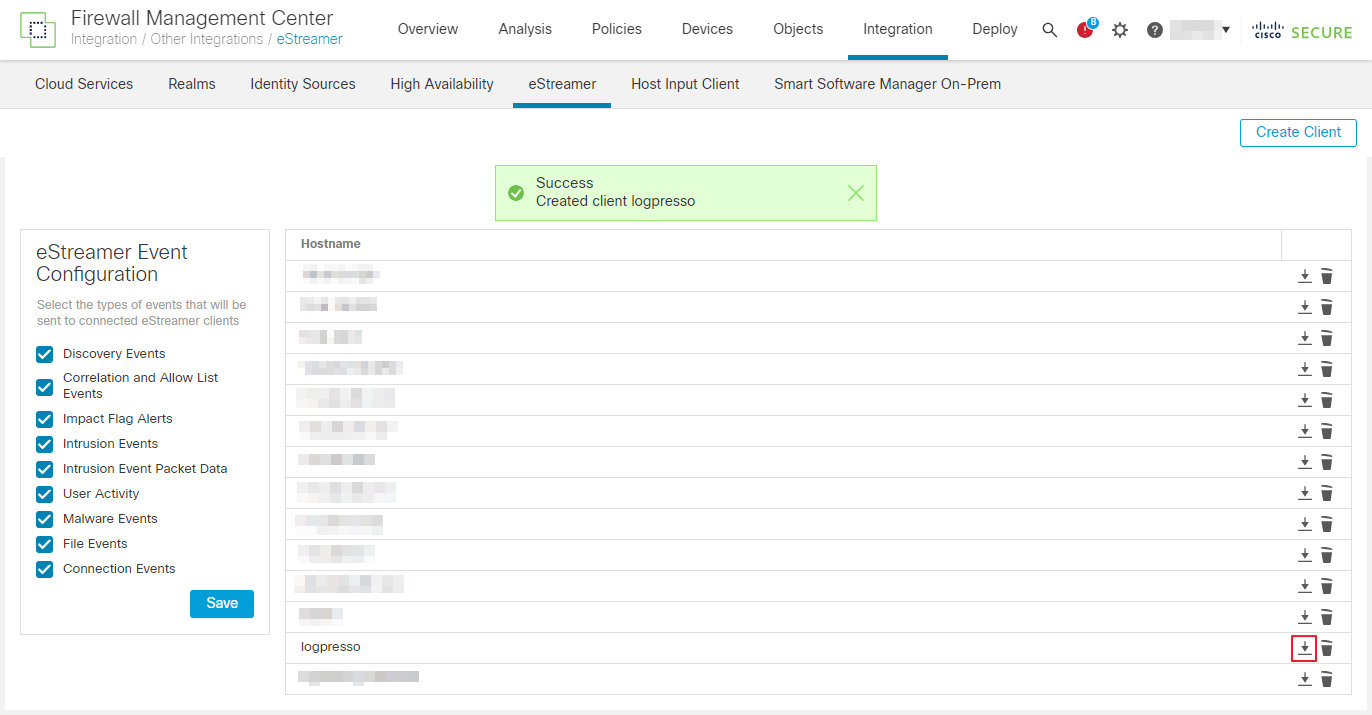
Click the Integration menu to display a pop-up menu, where you can click the Other Integrations menu.
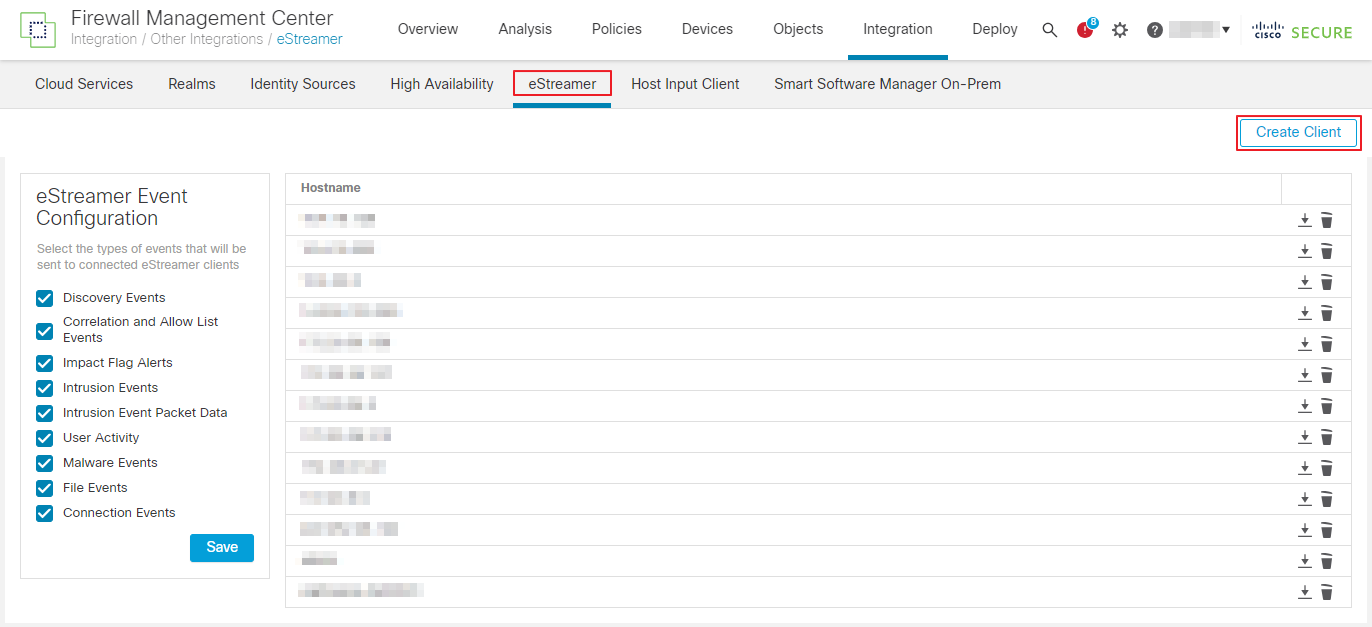
The eStreamer page appears.
Click the Create Client button in the top right corner.
Create a new eStreamer client with the name logpresso.
Click the download icon next to the client name to download the certificate file.
Set Up Connect Profile
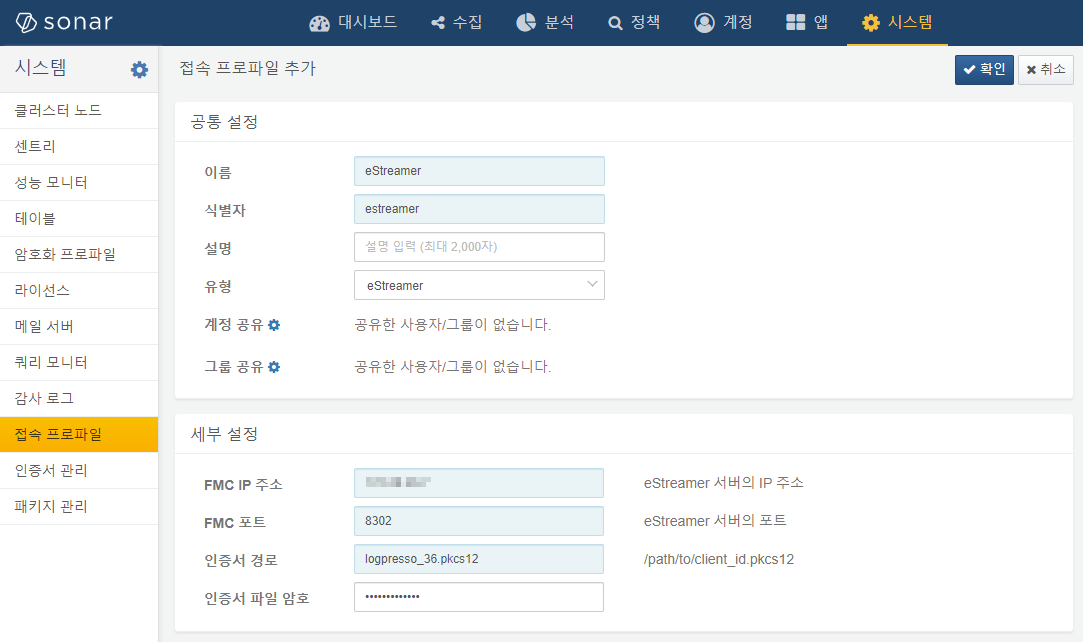
Upload the certificate to your Logpresso server. Ensure the Logpresso daemon is authorized to read the eStreamer client certificate file. Go to the System > Connect Profiles menu and add a connect profile of the eStreamer type as shown below.
- FMC IP Address: eStreamer server's IP address
- FMC Port: eStreamer server's port. Default is
8302. - Certificate Path: The absolute path to the certificate file
- Certificate Password: Password for the certificate file
Set Up eStreamer Logger
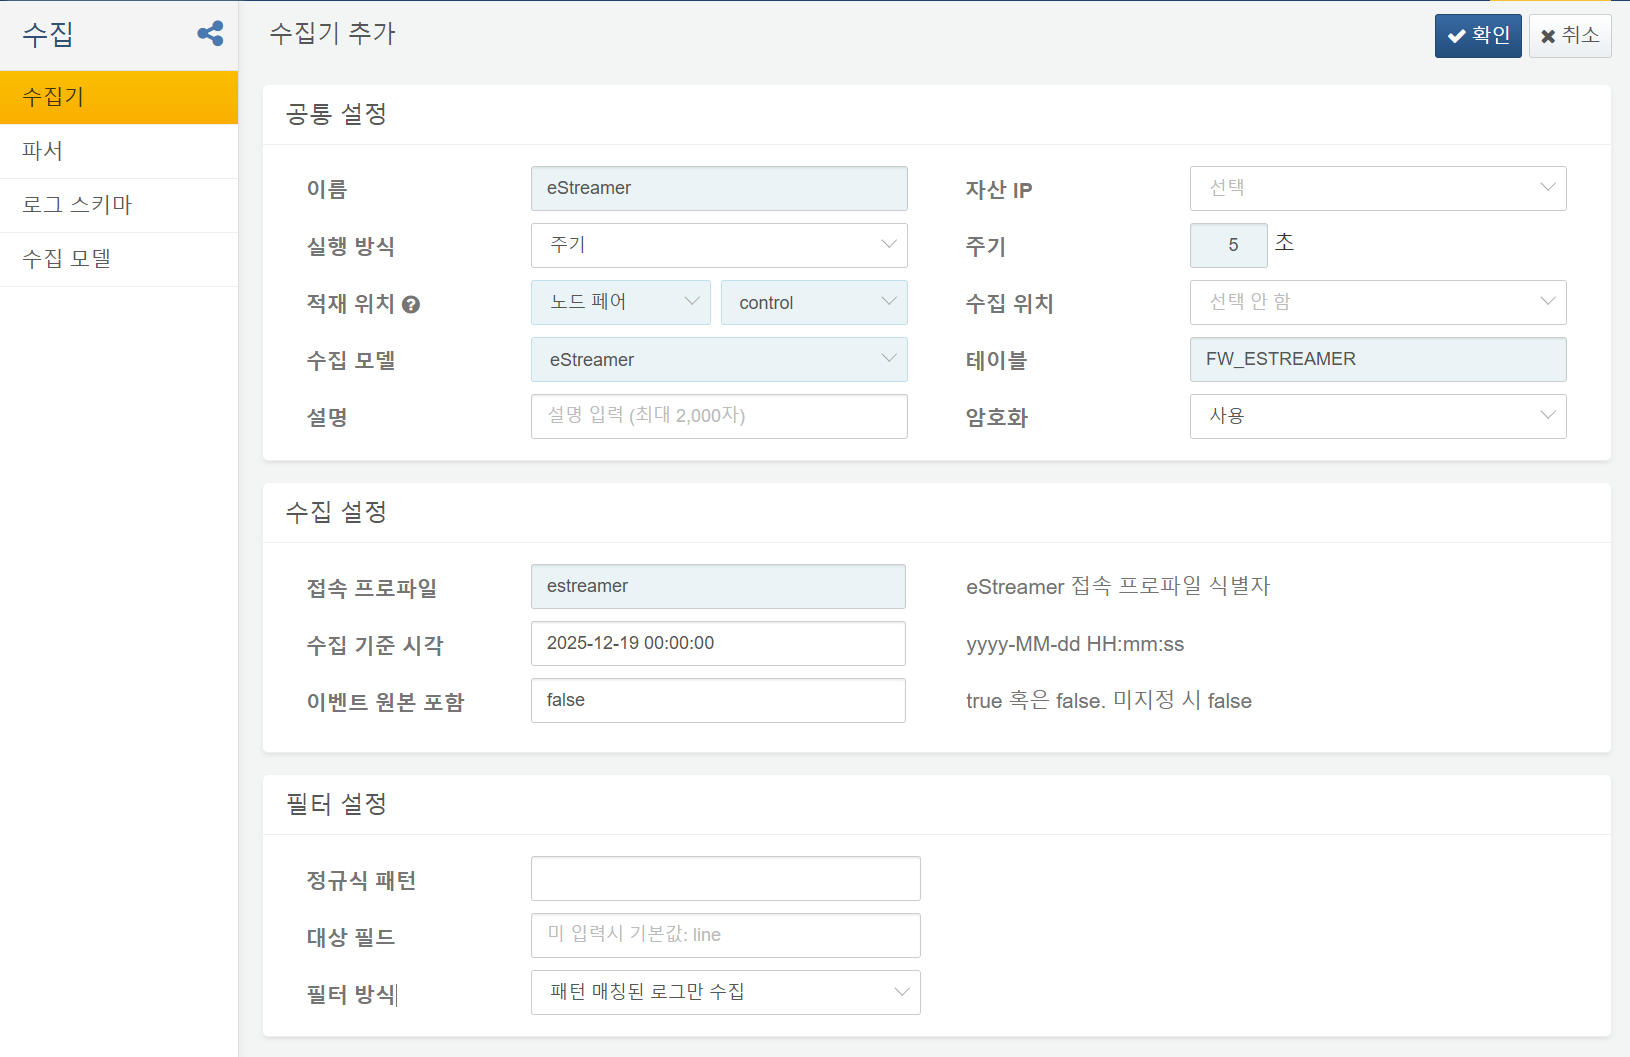
Add the logger and enable it as shown below.
- Table: Use
FW_ESTREAMERas the prefix. If you want to change the table name, you will need to modify the query in the eStreamer dataset. - Connect Profile: The identifier of the connect profile
- Start Time: If not specified, logs are received in real time from the current point in time. If you want to collect earlier logs, you must specify the time in the format
yyyy-MM-dd HH:mm:ss. - Include Event Raw: Sets whether to include the original event message in the log when collecting.

