Install Guide
Set Up Akamai SIEM Integration
Refer to the Akamai TechDocs - SIEM Integration documentation for detailed setup instructions.
Step 1: Turn on SIEM integration
-
Visit Akamai Control Center and log in.
-
In Control Center, under WEB & DATA CENTER SECURITY, click Security Configuration.
-
Open the Security Configuration (and the appropriate version of that configuration) for which you want to collect SIEM data.
-
Click Advanced Settings and expand Data collection for SIEM Integrations. Click On to enable SIEM.
-
Choose the security policies for which you want to export data. Select:
- All Security policies: if you want to send SIEM data for events that violate any or all security policies within the security configuration.
- Specific security policies: if you want data regarding one or more specific security policies. Select the appropriate policies from the dropdown list.
-
If you use Account Protector and want to include the unencrypted Username, turn on the Include username checkbox. When you include username, anyone with access to your SIEM output can potentially see this value and its associated risk score. If you use Account Protector and want to include the unencrypted Origin User Id, turn on the Include Origin User Id checkbox. When you include origin user ID, anyone with access to your SIEM output can potentially see this value and its associated risk score.
-
Copy the value in the Web Security Configuration ID field. You’ll need this later in the configuration process.
-
On the Security Configuration page, click Activate. Under Network, click Production, and then click Activate.
Step 2: Set up a user to manage SIEM
- In ACCOUNT ADMIN, navigate to Identity & Access.
- Under the Users and API Clients tab, create a new account. Assign the Manage SIEM role in the Assign Roles section and save the account.
Step 3: Get access tokens
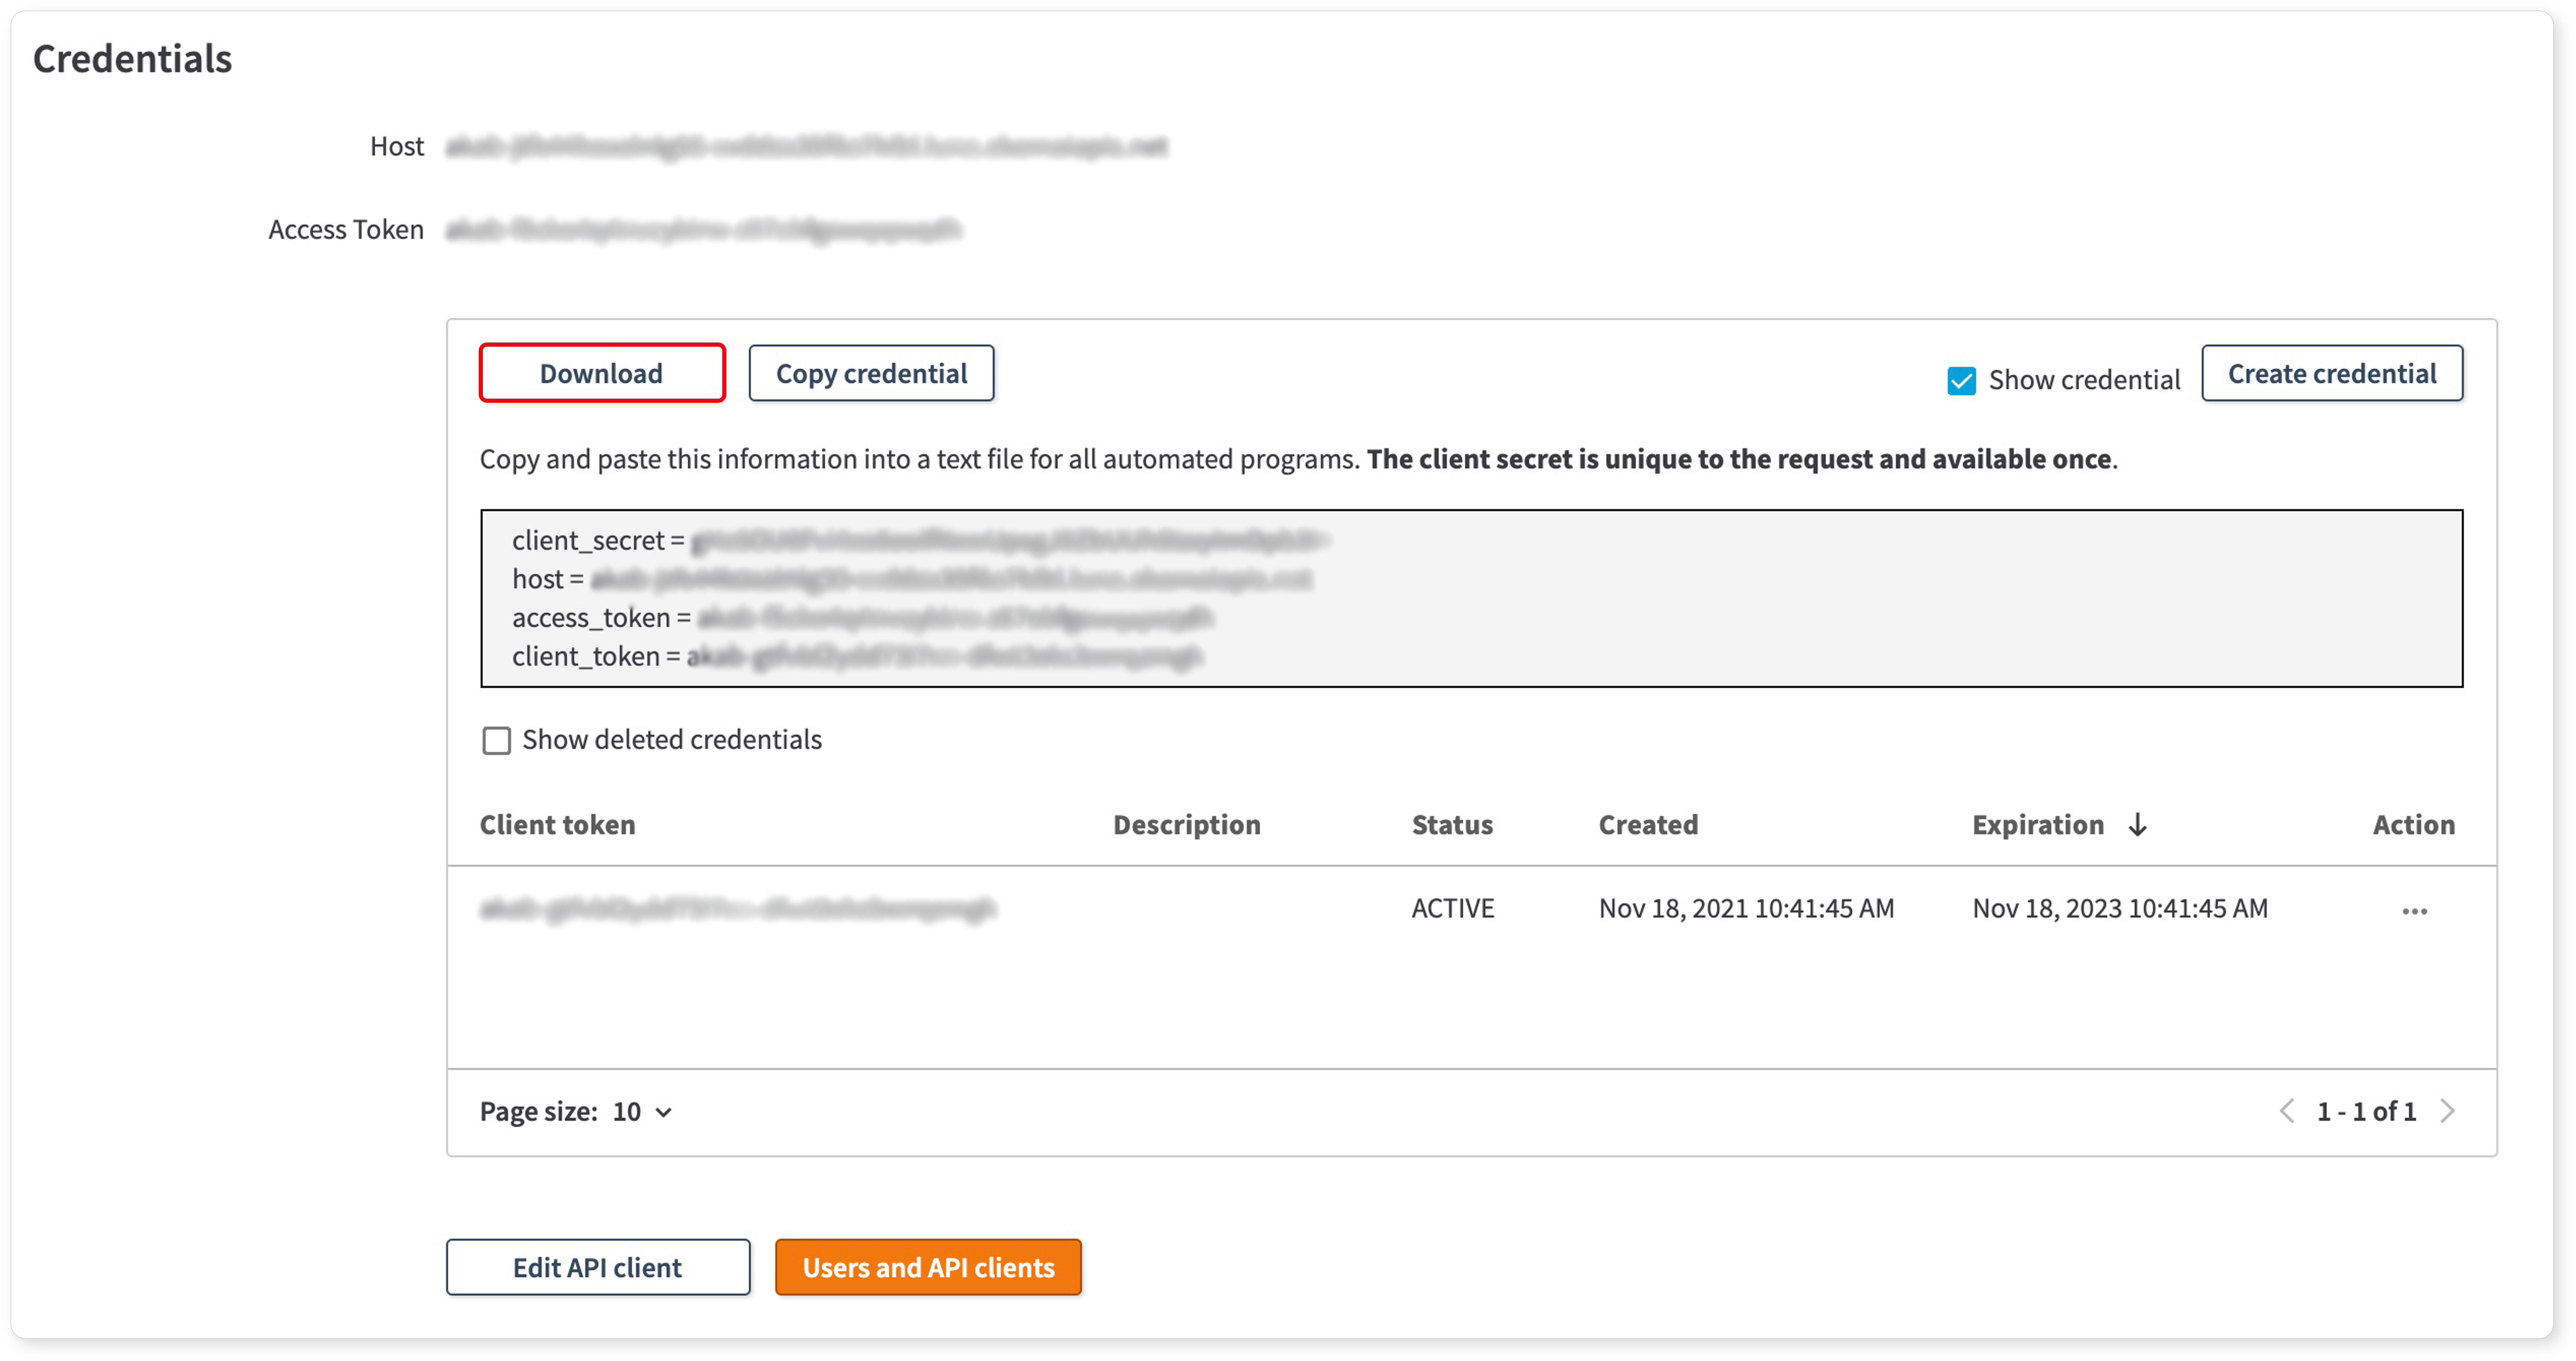
Follow the instructions in the Akamai techdocs - Create EdgeGrid authentication credentials to create an API client and generate credentials.
Set Up a Connect Profile
Refer to this article for guidance on adding a connect profile.
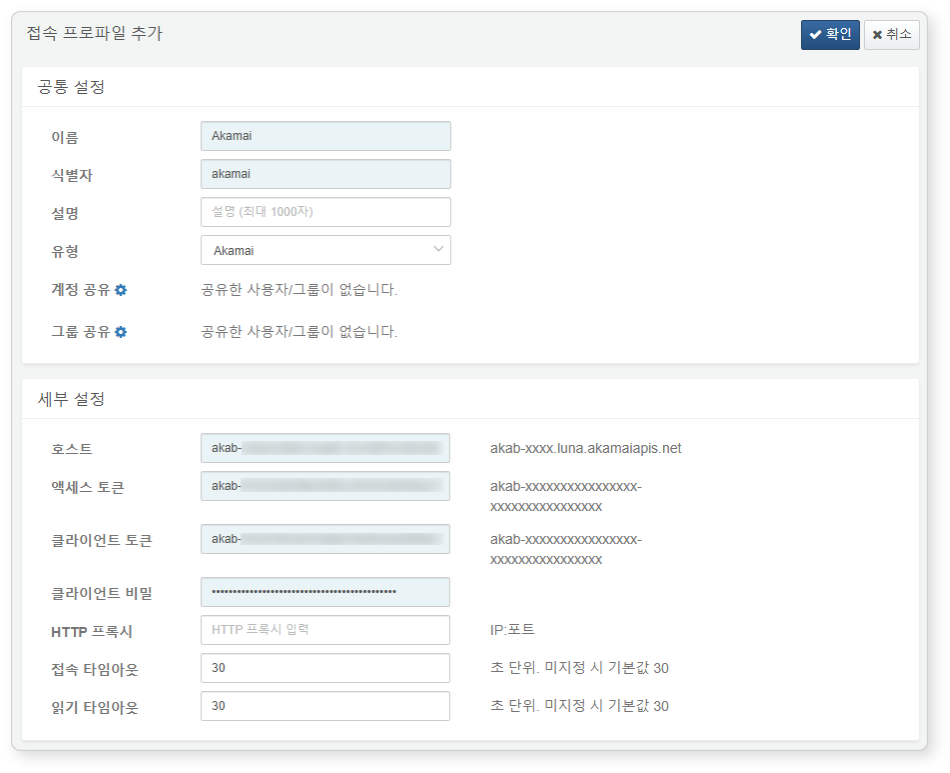
Required Fields for Connect Profile Setup:
- Name: A unique name to identify the connectn profile.
- Code: A unique identifier for use in Logpresso queries and other operations.
- Type: Akamai
- Host: Specify the host value from the previous step.
- Access Token: Enter the access_token value from the previous step.
- Client Token: Enter the client_token value from the previous step.
- Client Secret: Enter the client_secret value from the previous step.
- Connection Timeout: The maximum wait time for access (default: 30 seconds).
- Read Timeout: The maximum wait time for data retrieval (default: 30 seconds).
Set Up AKAMAI Logger
See this article for instructions on adding a logger. Default dashboards and datasets reference tables with names starting with WAF_AKAMAI.
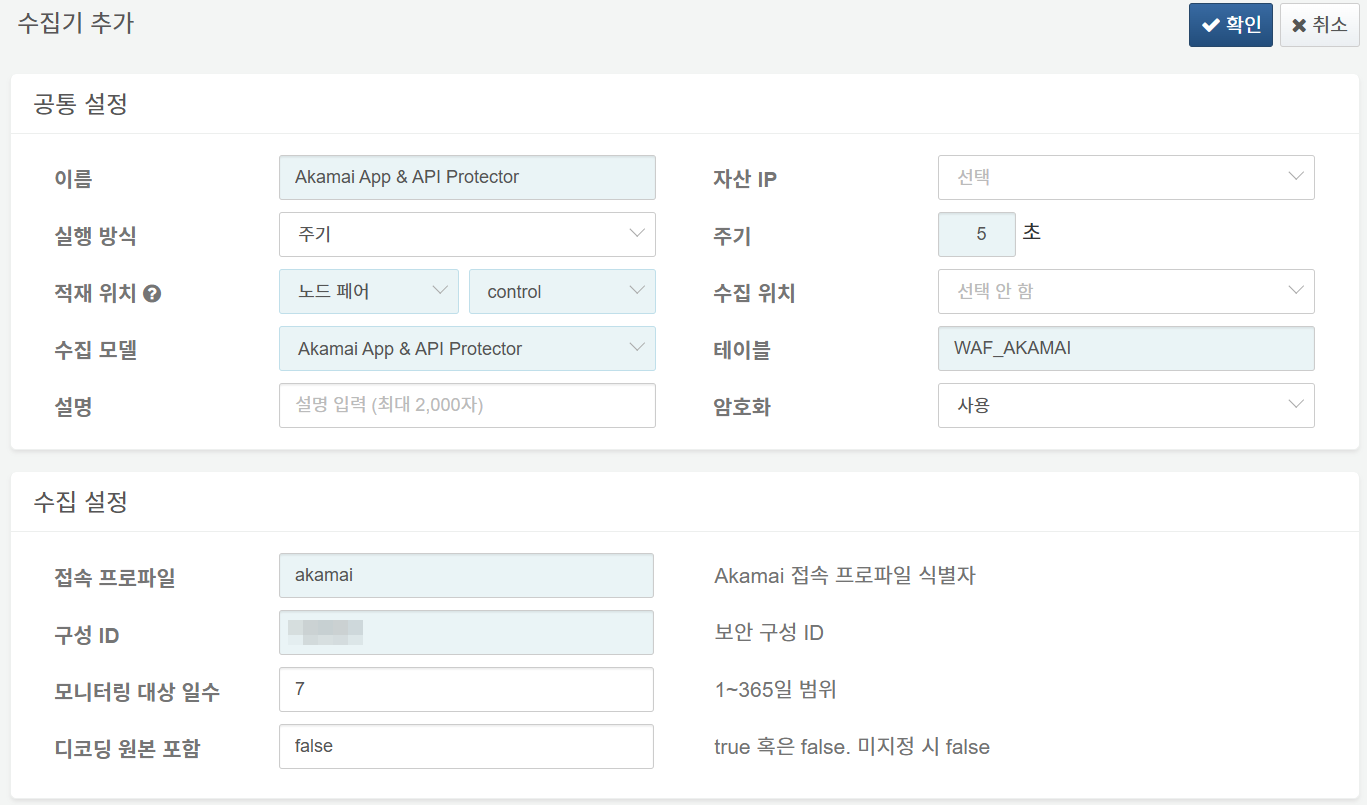
Required Fields for Logger Setup:
- Name: A unique identifier for the logger.
- Interval: Set to 5 seconds.
- Storage/Data Source: Select the appropriate node based on your Logpresso platform configuration.
- Logger Model: Akamai App & API Protector.
- Table: Specify a table name beginning with WAF_AKAMAI.
- Connect Profile: Use the connect profile identifier configured in the previous step.
- Configuration ID: Provide the Akamai security configuration ID.
- Number of Days to Monitor: Set a range from 1 to 365 days.
- Include Decoded Raw: When set to true, the decoded original log field is added. (default: false).


